Published 14 December 2015 ● Last Updated on 25 November 2016
After the inevitable Christmas shopping spree, despite best efforts to carry my own shopping bags, I ended up with a fair number of plastic bags – and quite a few of them (I hate to admit) good looking!
So I decided to make the best of it and apply my learning from the Upcycling Plastic workshop by theKANG! It is fun, easy and quick to transform crinkly carriers into bright trinkets. And what better timing than this merry holiday season, with so many gifts that need tagging and the Christmas tree that needs decorations!
Here’s a short step-by-step guide, or just scroll below to see our video!
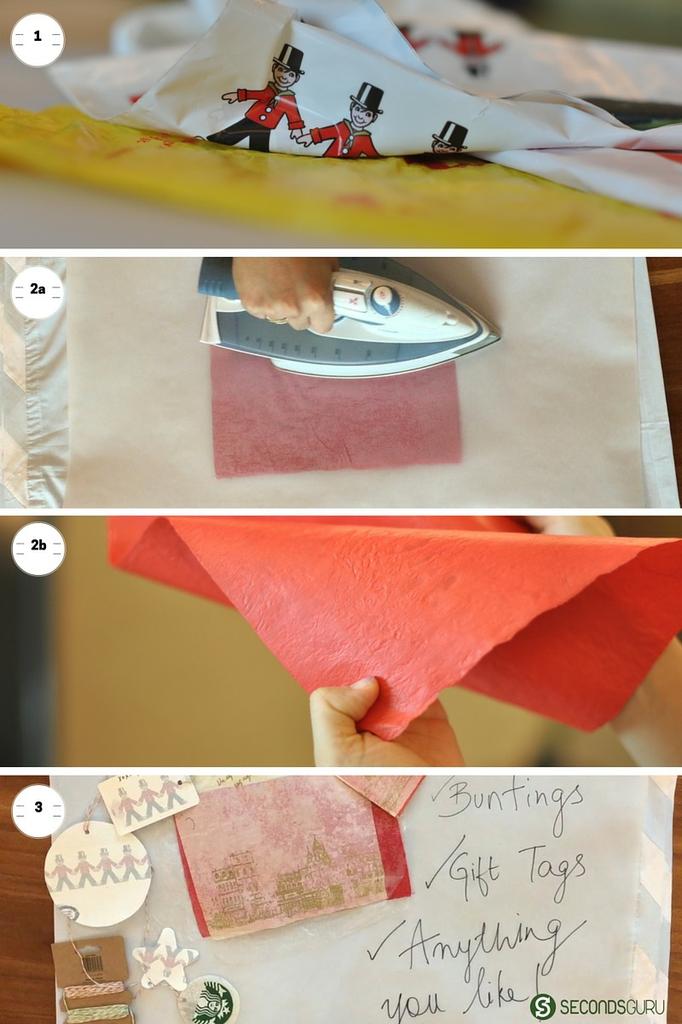 Step 1. Select the plastic bags.
The thin crinkly one, the type you get at grocery stores, would work best as a base. For the pattern atop, use thicker and glossier pieces. We used Hamleys’s to great effect (note the gift tags featuring the top hat guy in the video!).
Steps 2. Heat and fuse.
Trim the bag and sandwich it within tracing paper. We used Diamond tracing paper, purchased from Art Friend, as recommended by The Kang (where we learned this technique!).
Use hot iron to fuse the folds together, two at a time. Make sure any pattern (and therefore its ink) is folded in, and not sticking to the tracing paper. Start at a medium heat setting, no steam. Go hotter gradually if fusing doesn’t occur. You don’t want the setting to be too hot or the plastic will get holes!
With little practice (experiment with some samples if you are a first-timer!) to apply the correct pressure and manage the heat. Keep folding the layers till you reach the thickness you like.
In the end, add the print as a top layer. Again, make sure the print’s ink is not in direct contact with the tracing paper. You can fuse the printed bag upside down. Or, as in the video, fuse a transparent plastic bag on top of the patterned bag.
Step 3. Embellish.
Use your imagination! You can cut out stars, bells and circles to weave a bunting. Or you could create bookmarks for simple gifting. The craftier among you can sew things together! For us, gift tags were the need of the hour, so we simply punched holes and added twine on a quite a few pieces.
The DIY video is self-explanatory, but there are a few questions we expect you may still have. Leave a note in the comments below and we’ll respond ASAP.
And when you’re done, do share your results with us on our FB page!
Related articles:
Showcase | Upcycling plastic bags with theKANG


0 Comments