Published 12 March 2017 ● Last Updated on 12 March 2017
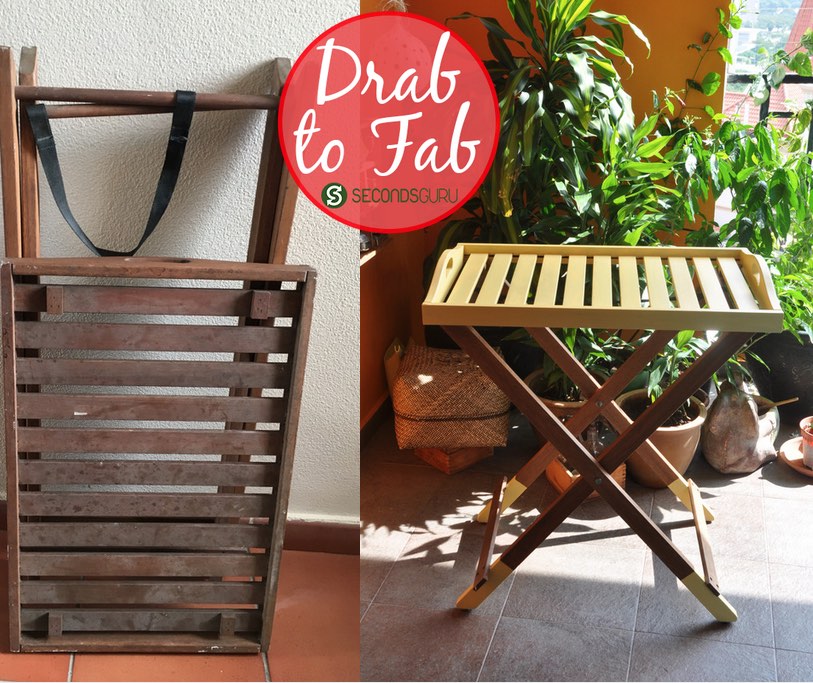
Usually, I don’t go for broken, dusty tables. But, when I saw this wooden tray table lying abandoned in the basement, I couldn’t ignore the fact that it was free, no shipping costs involved, and (no small thing) I had DIY duties to fulfil for Secondsguru! True, nothing had come of the abandoned pallet I had last picked up from this same benevolent venue, nor did my kids really play with the wooden puzzle boards that I had picked up before that, but… seriously, it was free and I needed a table. No brainer!
One week of procrastination and a few hours of work later: ta da! I have a bright side-table that has enough space to hold a small planter and several cuppas in style. Total cost: $0, as I used only those materials that were already lying around the house. The Indian me is so chuffed!
 If you have wooden furniture, own or adopted, that you’d like to spruce up, below is a ready reckoner that you can follow. It is easy enough for beginners, fast enough for the impatient, and safe enough for kids to help out with!
#1 Cleaning up and assessment
First things first, clean up properly with a damp cloth, or even wash down with water if you have a particularly grimy item. Let dry. If the piece has been in storage for a long time, or you picked it up from a warehouse, do a check to ensure there are no bugs / termites before you proceed.
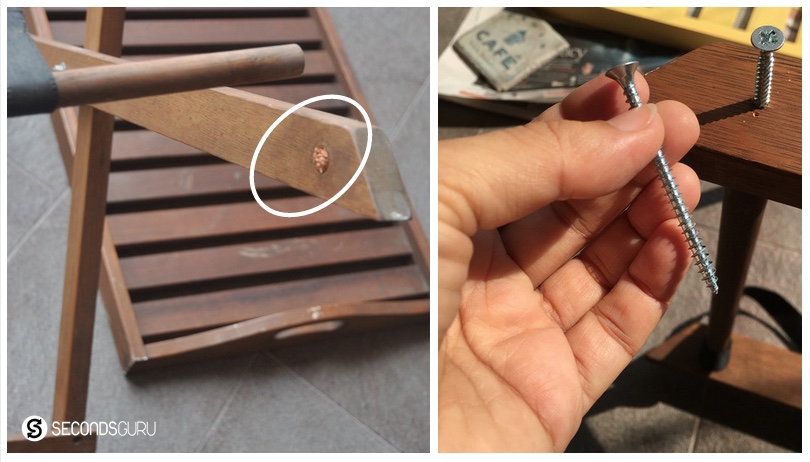
Inspect the furniture for any cracks or injuries that may need special attention. The table I picked up had a clear break. Luckily it wasn’t a load-bearing joint, still, I needed to plan a cosmetic repair – which I managed very simply with a long nail. [The disjointed rod you see in the picture is useful in keeping the base it shape when the tray is removed from the table – but I didn’t expect to use the tray separately]. The wood was soft enough that I didn’t use a drill to screw in the nail – just a screwdriver and the husband’s muscle power!
#2 Sanding
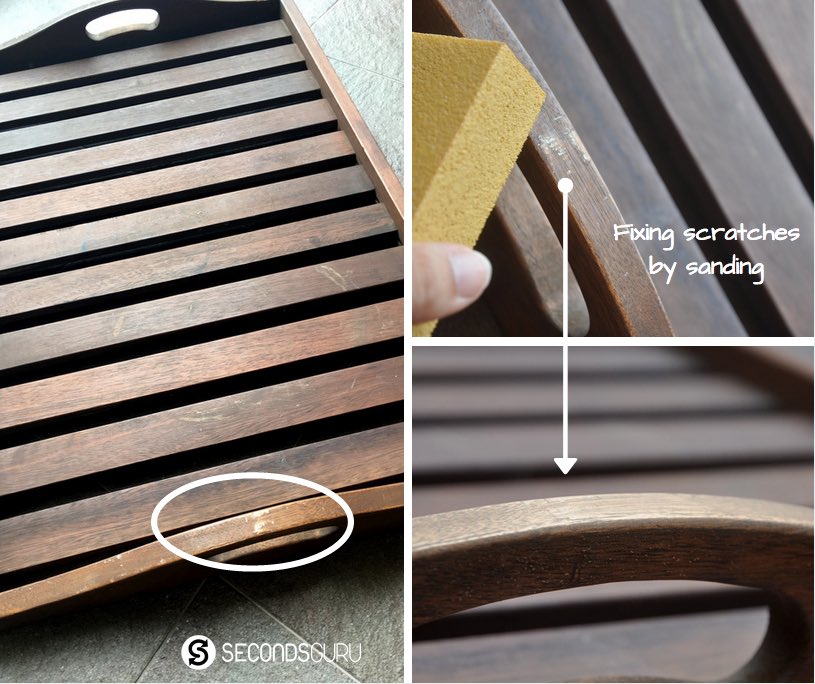
Sanding is a necessary part of preparing the wood, and a thorough job goes a long way in making the painting look professional. Pick a medium grip sandpaper and rub in the direction of the grain; apply pressure evenly as you progress. Even if only a part of the furniture is scruffy/ damaged, sand the entire surface of the furniture. It will help get rid of old scratches, old finishes and stray paints that commonly deface old wooden furniture. I used a 3M SandBlaster (instead of sandpaper) as I prefer a sponge’s grip. It is easily available at Self Fix.
 If you are a first-time sander, just a heads up that yes, there will be dust! Wear an apron and/or rough clothes when you sit down for the job. And if your hands are sensitive, or the abrasive texture annoys you, use rubber gloves to protect your skin.
After finishing sanding do not overlook a second clean-up. Use a damp cloth and ensure the wood is completely dust free (or else the painting finish will be compromised).
#3 Choosing a design
Do you have a go-to place for inspiration? I usually end up at Pinterest, and scrolling back over the Secondsguru board, was reminded of an old desire to introduce dip-dye legs into my home. My house has a lot of traditional overtones – wood, Indian motifs, etc. Something more modern would stand out, I felt, and zeroed in on the idea of a bright tray with matching dip-dye legs. To ensure the contrast was not jarring, I stuck to a warm palette in line with the current room decor.
#4 Painting
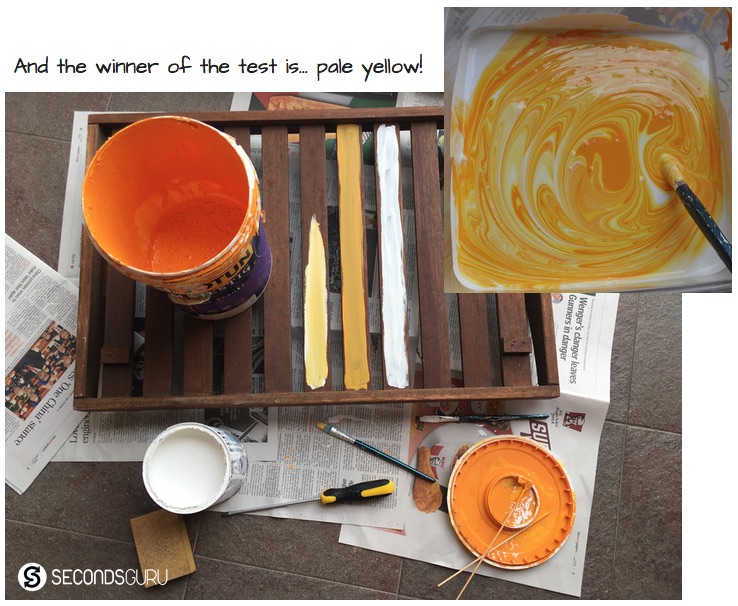
Over time and projects, I have become more flexible about the paint I use over wood (It is easy to experiment when you are trying it on free stuff!). Look over the acrylic / primers / house paint you already have lying around. Labels will give you a good indication if it will work over wood – so many paints nowadays are devised for multi-surfaces. Nevertheless, test over hidden surfaces of the furniture before making a decision.
I dug out the leftovers from my house repainting last year, and tried some of them on the back of the tray. The white primer and & orange wall paint mix worked well over the wood, and that’s what I have gone ahead with.
 As for painting brushes: pros will wax lyrical over what brand / type you should use. I simply raided my children’s paint box!
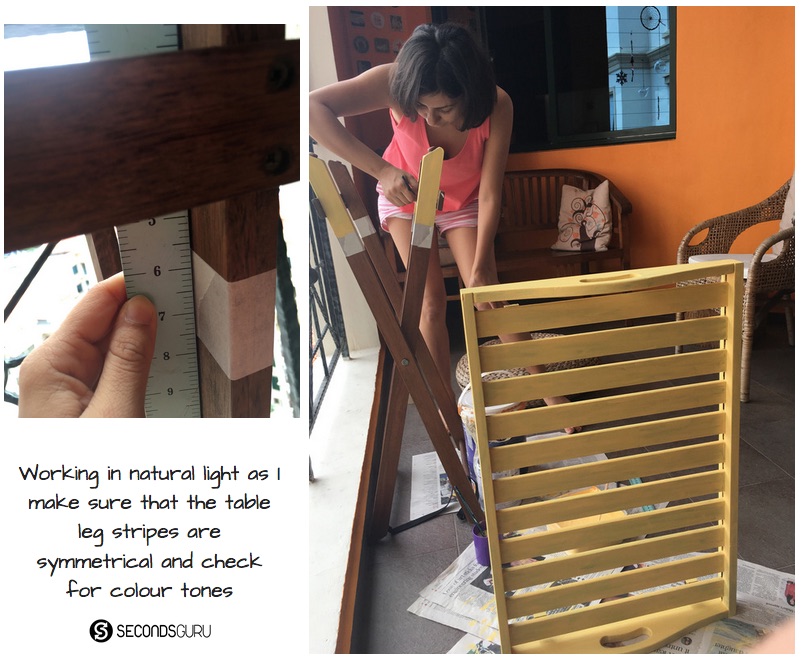
In order to get a dip-dye look over the legs like I created, you will need masking tape. Gauge how long you want the paint to stretch and stick masking tape to mark the edge of it. Measure carefully so you can replicate the edge symmetrically over all four legs.
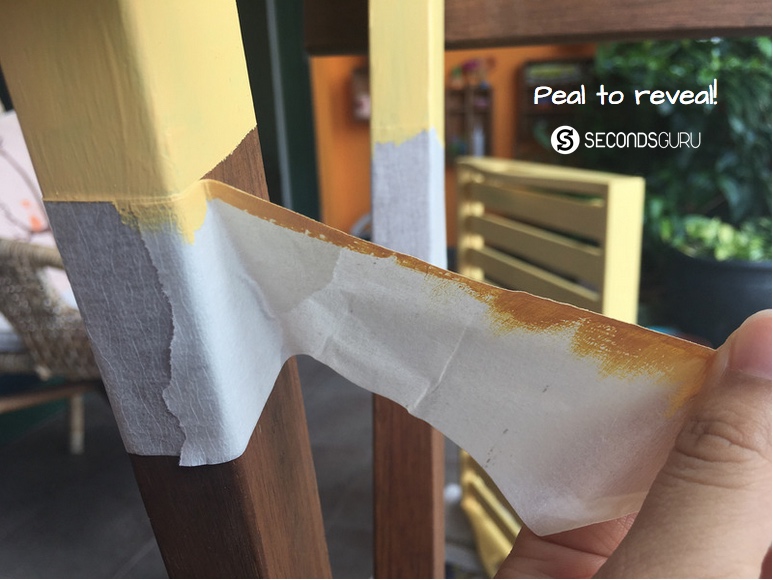
 Now comes the fun part. Spread the newspaper, let the family members join in, and brush over the colour in even, uni-directional strokes. Let dry after one coat and assess if you need a second coat (you probably will). Parts of your work may need correction: just spot-correct with a third coat till you have an evenly painted piece. Let the paint fully dry between coats. Remove masking tape in the end.
Once the paint dries, the furniture will look good enough to use right away… but don’t!
#5 Sealing
Regular use of furniture leaves it vulnerable to scratches, painted wood is even more delicate. Use a sealant to protect the surface: non-yellowing polyacrylic water-based top coats are recommended – but to be honest I haven’t tried them in the past and didn’t want to take a chance now. My go-to sealant of choice is lacquer spray [I use Watco gloss, available at Self Fix], and since its label gave a thumbs up for painted wood, that’s what I went ahead with. (Of course, I first tested on the bottom of the tray.)
Whatever the sealant you use, wait for the paint coat to completely cure before sealing. I gave my painted tray-table a 3-day rest before applying 2 coats of lacquer spray. Now it is truly ready to hold my cup of tea! 
Related Links:
Vintage sewing machine goes glam
From the readers: Balcony table turns Grecian chic


0 Comments