Published 28 November 2017 ● Last Updated on 11 August 2020
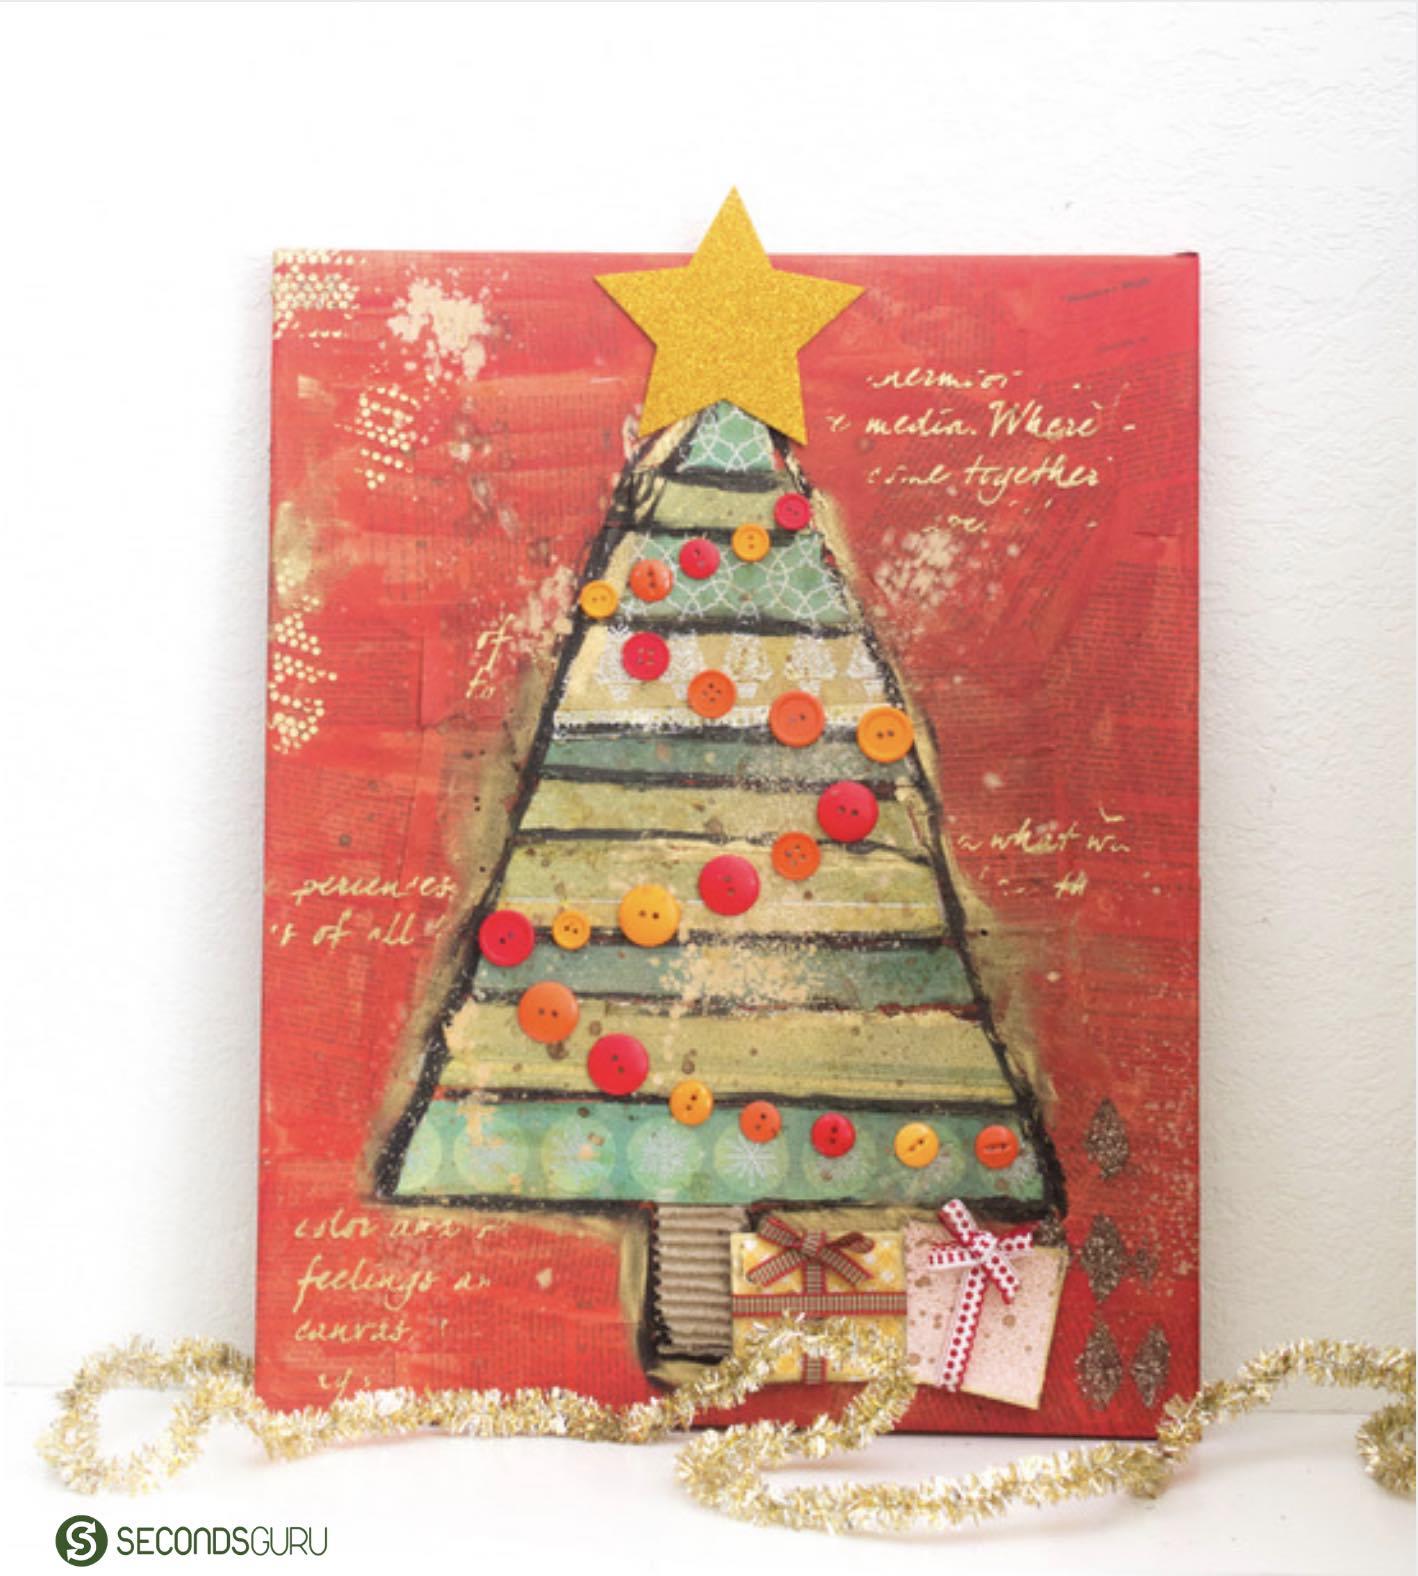
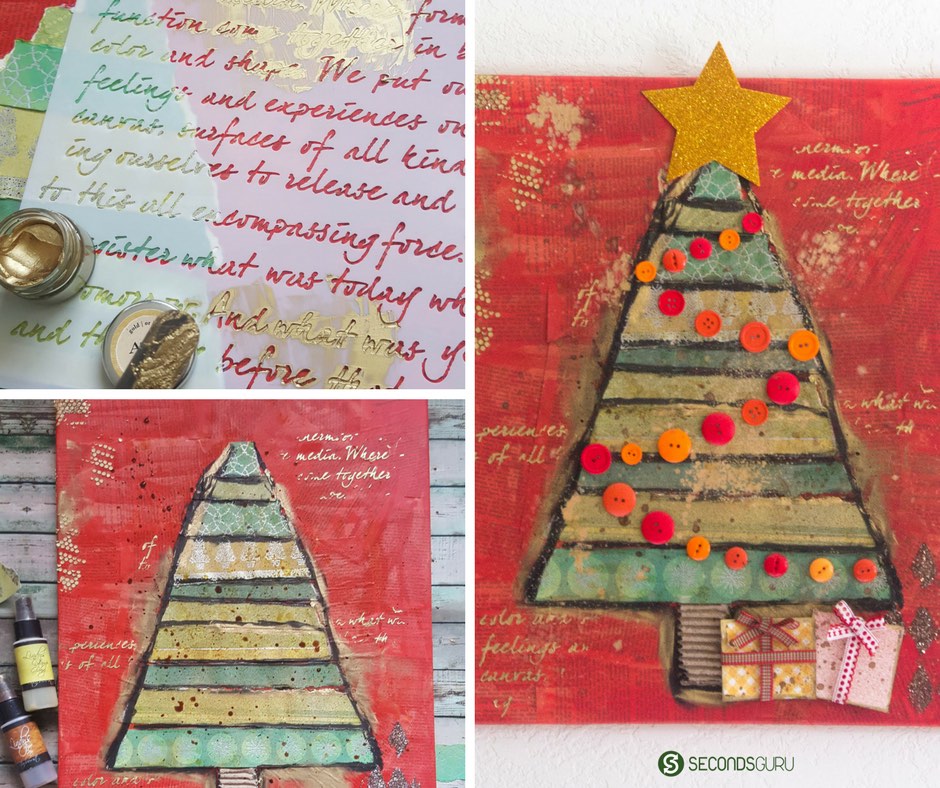
Christmas is just around the corner, and like every year my daughter wants a Christmas tree, and just like every year, we are telling her that we can’t… Instead, like last year we’ll try out some fun substitutes! We made a fun tabletop Christmas tree using egg cartons last year (get the instructions here on Secondsguru). This year I’ve made a Christmas Tree Mixed Media Canvas.
Here’s how I made it, and you can too!
Step #1. Set the base
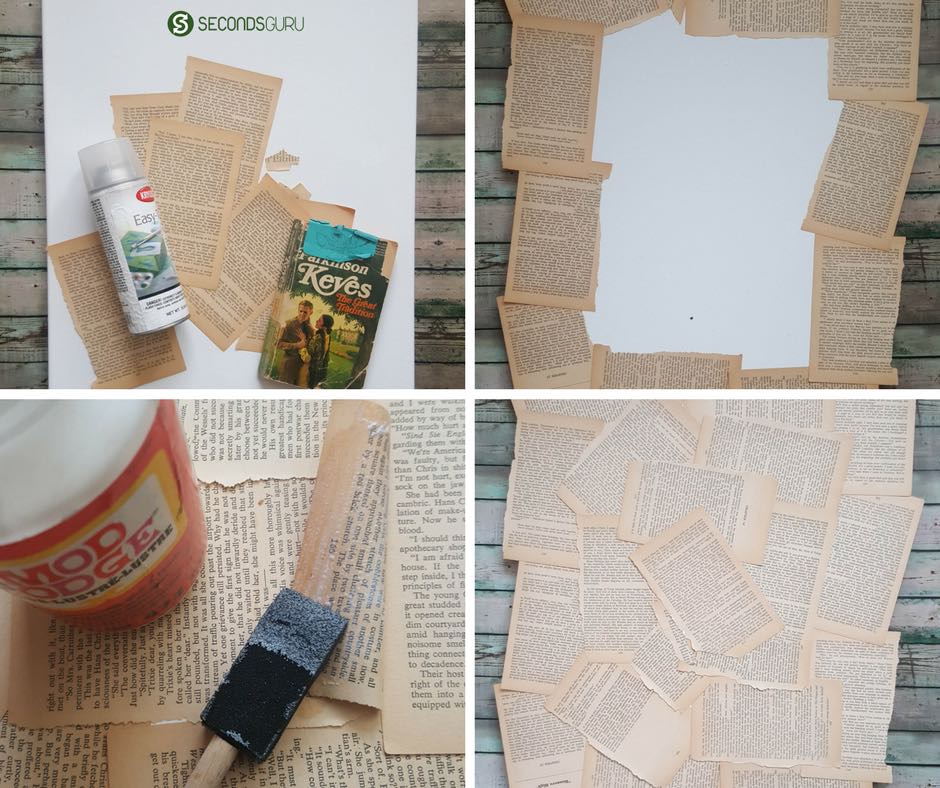
I started with a 16” x 20” blank canvas. We are going to cover up the canvas with paper; this could be a great way to give a new lease of life to an old canvas too. I sprayed the canvas evenly with spray adhesive and placed sheets of paper from an old novel. If you prefer non-spray adhesives such as Mod Podge, or any liquid glue, that would work fine too. (Spray adhesive speeds up the process)
First, add the sheets around the edges with a slight overhang as we intend the paper to wrap around the sides of the canvas. Next, cover the entire canvas with slightly overlapping sheets of paper. Once the canvas is fully covered, turn it to to the side to fold over and stick the overhanging sheets of paper to the edges of the canvas using Mod Podge.
In the end, take the overlapping part of each sheet, fold it over, apply glue and stick. We have to do this step as the overlapping regions don’t have adhesive between them.
Step #2. Prepare the tree
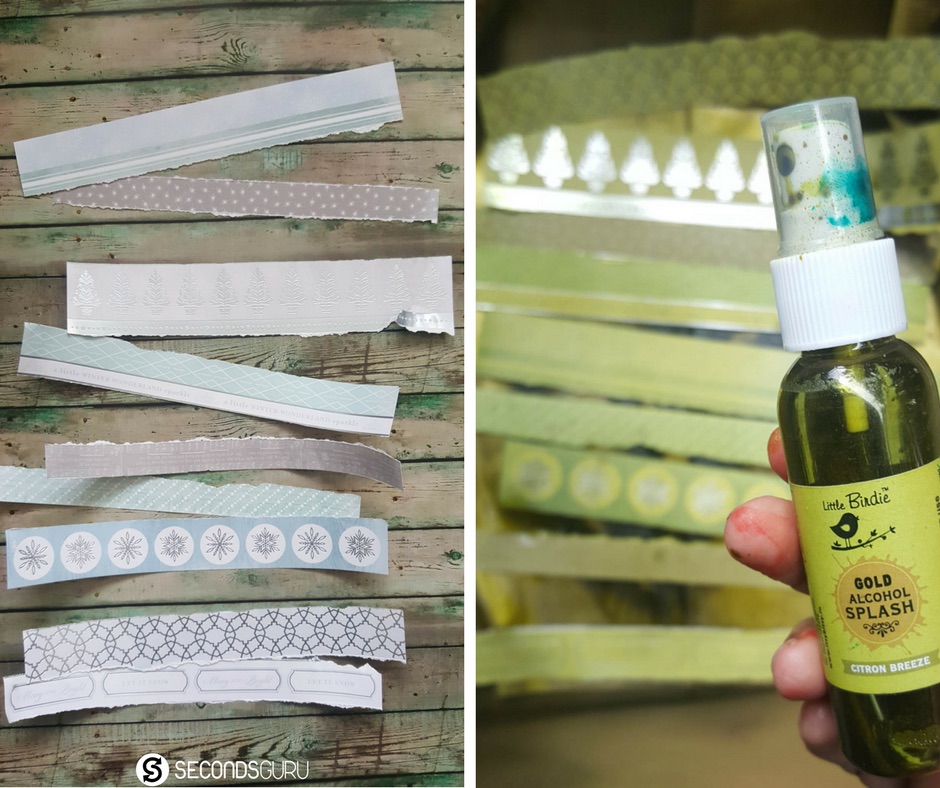
Let the glue dry for an hour or so. In the meantime, take some patterned paper or gift wrapping paper and tear out strips with a metal ruler. Spray them with green shimmer spray and set aside to dry.
Step #3. Paint it red
Once the glue on the canvas is dry, paint it over with red watered down chalk paint. The consistency of the paint should be such that the text on the background is slightly visible through the paint. If the paint is too thick, it will be completely opaque, and the text will not show through on the other hand if it is too thin the background text will be too prominent and interfere with our primary image.
Let the paint dry completely before proceeding to the next step. The paper on the canvas will appear wavy while the paint it wet, do not worry as it will dry smooth.

Step #4. Add the tree
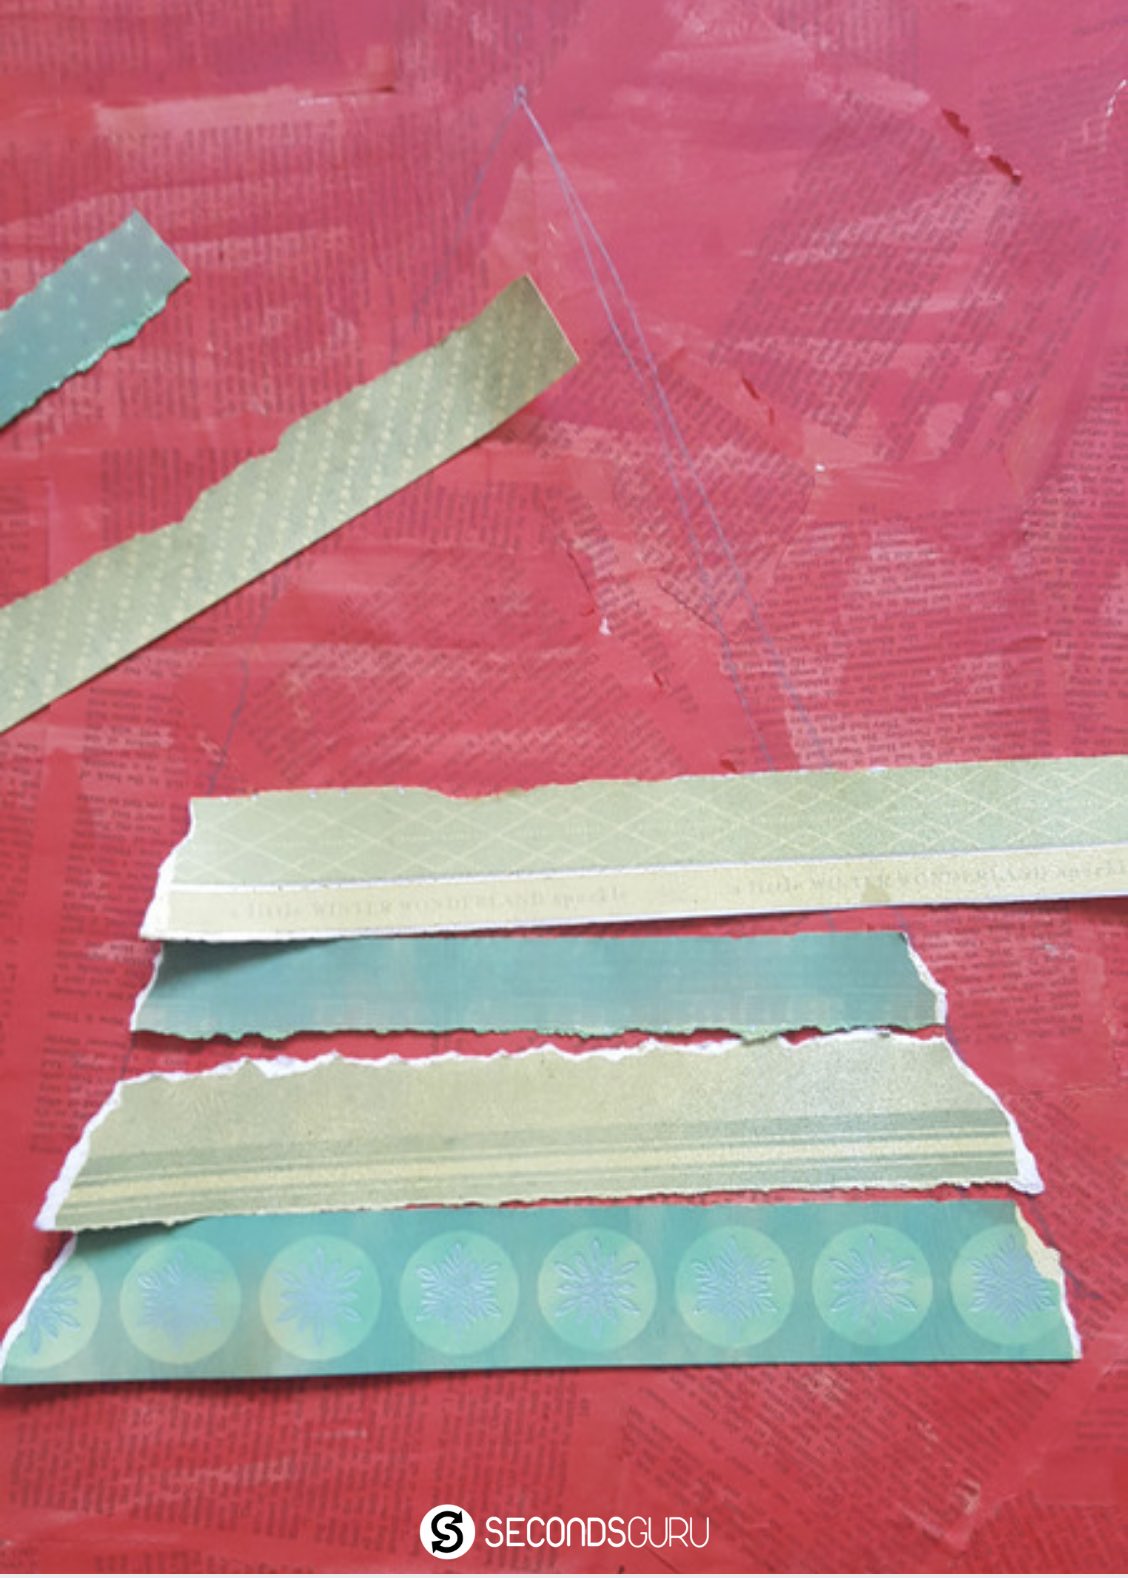
Draw a free hand Christmas tree in the middle of the canvas once the paint is dry. Tear and place the strips of paper to form a Christmas tree. The strips don’t have to be aligned perfectly, tilt them a little for some added interest. I also added a tree trunk made of a piece of packaging cardboard.
Step #5. Accessorize!
Now go ahead and decorate your canvas as you please. I used gold texture paste through a few stencils to add some texture and dimension. I also used a lot of shimmer sprays and added gold and black outlines to the tree. I added a glitter star, some buttons as Christmas Tree lights and a couple of gift boxes below the tree to finish my canvas. As you can see – there are no rules for this, just go with the flow and have fun!
I love how the canvas turned out; I hope this has inspired you to create something of your own!
Related posts:
Maker a mini Xmas Tree out of egg cartons!
Upcycle old plastic bags into Christmas tags and decor
Juhi is a semiconductor engineer turned entrepreneur. Apart from running her paper crafts business, she designs cards for a few stamp companies, does freelance craft blogging and is a UX designer. She has a 5-years-old daughter who loves paper crafts as much as her; needless to say they have a lot of fun crafting together. Follow her on Instagram for inspiration!


0 Comments