Published 9 July 2017 ● Last Updated on 30 September 2020
If you have ever given a child a gift, or remember your own childhood, you know how important packaging is. The present itself is loved of course, but the box it comes in – now that’s a treasure, the bigger the better! It could be a rocket, or an office, or a boat, or a bus. It could be a suitcase for all the stuff toys, or the raw material for the next craft. It could be a bench, or a robot, or a peekaboo playmate. It could be a TV screen, a transformer costume, or a drum. It could, literally, be anything!
At my age, of course, I’ve gotten over boxes, at least the cardboard ones. But wooden crates? It’s hard for me to look at a wine case without admiring the grain of the wood, and the insignia etched thereon, and where in my house it would be best placed at! I don’t buy wine in cases, so my imagination hasn’t been able to have its way much – yet, over years I have managed to collect enough crates to hang shoulder to shoulder upon a wall. The few times I have awkwardly asked wine stores if they have some to spare, I’ve been told they’re no longer given free and are now for sale. [Another sign we live in an Etsy and Pinterest age!]
So imagine my surprise when I saw a beautiful wooden case, sitting amidst discard next to our condo’s recycling station! Did someone really think this was trash? Before they could realise their mistake – I quickly grabbed it and got it home.
What I did next is this transformation!
The rest of the post is all about the makeover; and it starts with a box, a wooden box, which is almost all that you need!
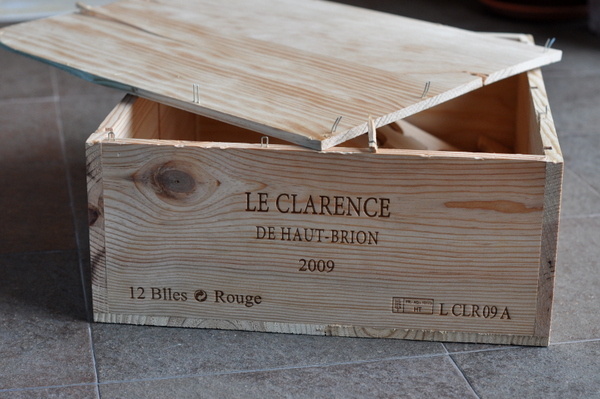 If you are among the lucky few who are expecting to gain a wine case from an upcoming delivery, do make sure that you open the case carefully, with minimal damage to the wood. Since I picked up this particular wine case from my basement, where it stood discarded and dusty, preparing the crate was imperative. (Note all those nails sticking out!). If you are expecting to score a wine case from similar situations, or made a mess during opening the case (!), here’s what you do to begin:
First, check for safety: any protruding staples? Remove these carefully with a pair of pliers, especially if a sharp end is sticking out. For first-timers, these pictures show you exactly how to go about removing staples:
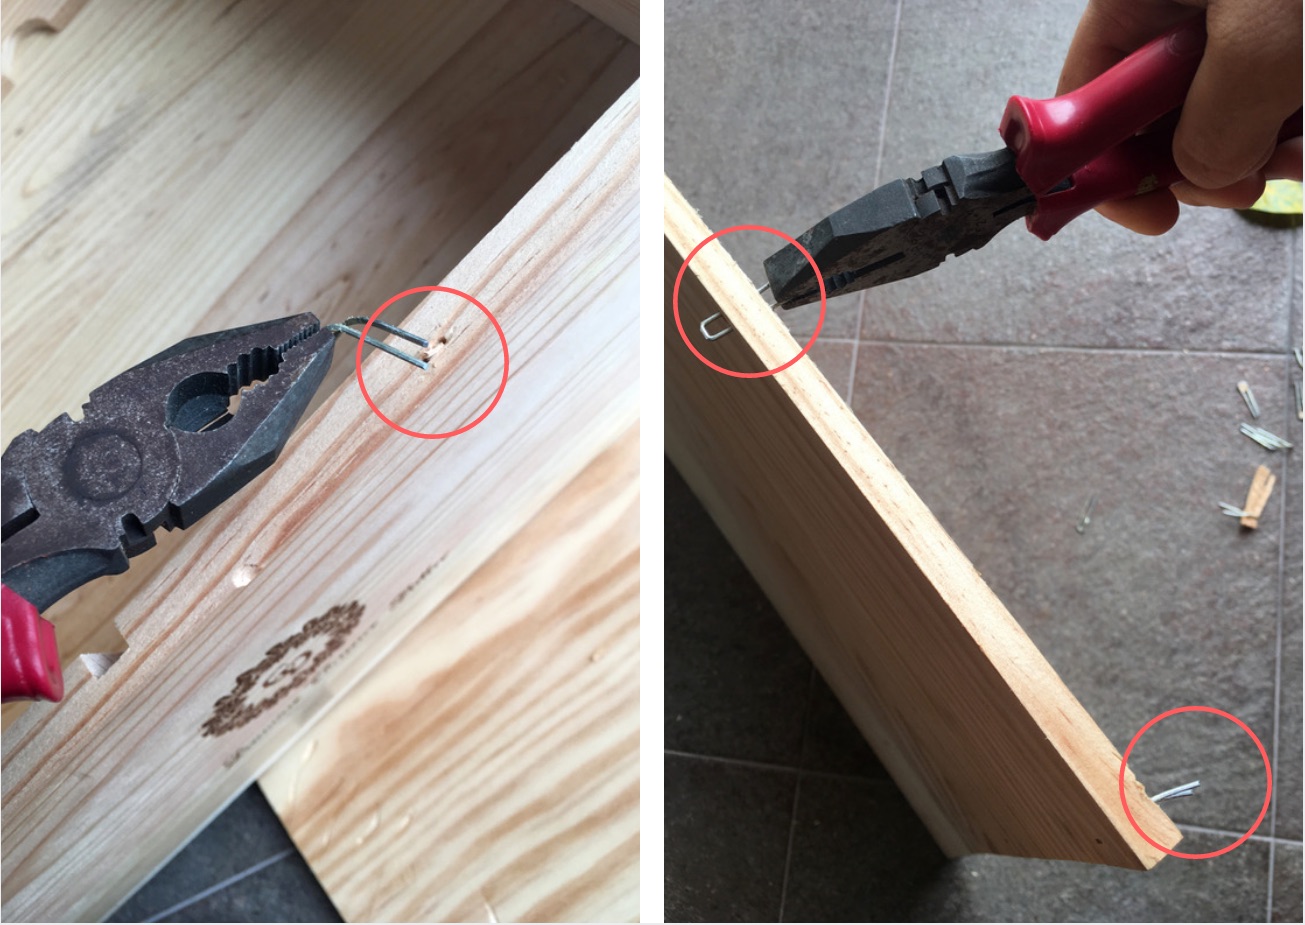
(Right) This is harder! See the pointy side of the staple? Grip, breathee, and wriggle while you PUSH! Once the staple protrudes from the other side, pull out.
Also check the case for damages: any splinters, or rough edges that could scratch skin? Use a coarse-grip sandpaper to smooth the wood. I usually use sanding sponge, available at Self Fix, as it has an easy grip. Just a few strokes on the edges were sufficient to blunt the sides of my lightly-used wine case.
Now use a damp or wet cloth for clean up – clearing away any dirt and sanding residue – and then dry thoroughly in natural sunlight. Don’t throw away the separators – you could find a use for them later, or (like me) use them for testing color tone, etc later in the makeover activity.
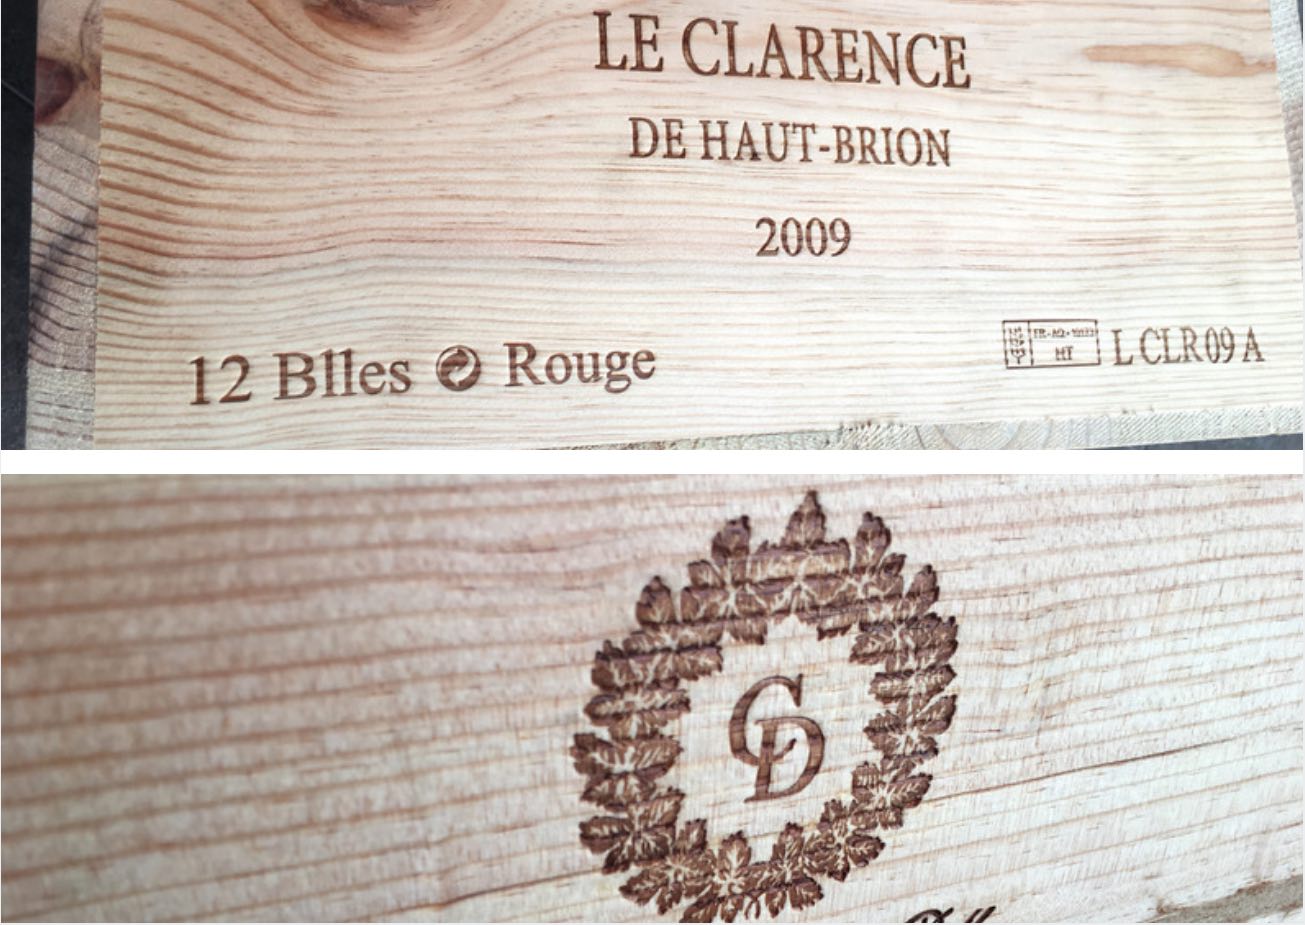
Most wine cases I have come across use good wood and need minimal preparation to look fetching. With laser etchwork on the sides becoming more common, the graceful logos alone make the cases look like artwork! Even this particular case, spruced up after the cleaning, was in great shape.
Though the base box now looked faultless, sadly, the cover was damaged / cracked. So I spent some time assessing my options, and decided to create 2 separate makeovers for them. As is usually the case in my DIYs, I spent more time planning and procrastinating – the actual work was fast, fun and easy!
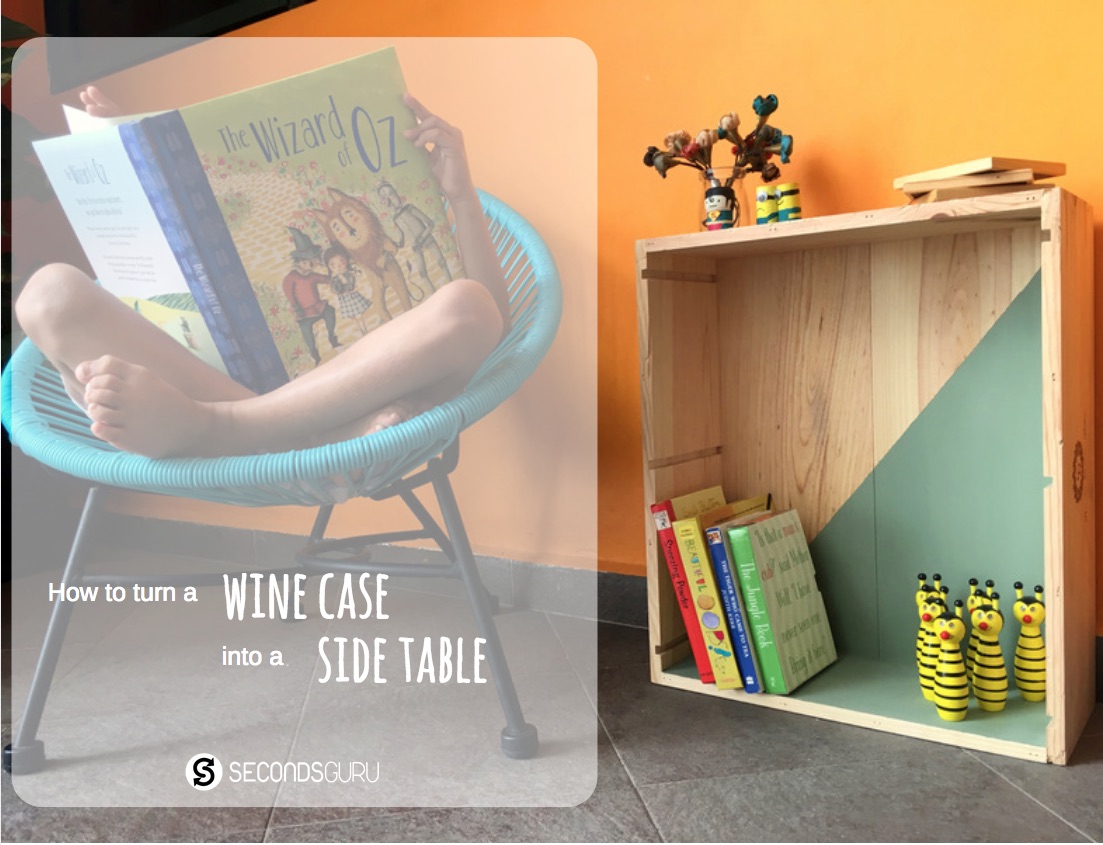
#1 TURNING THE WINE CASE INTO A SIDE TABLE
My first inclination on meeting a wine case is to turn it into a hanging shelf. See my balcony below? You can literally see my usual plan of action!
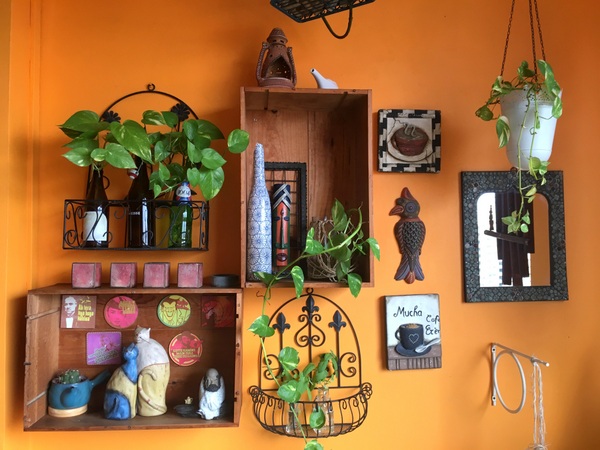
However, this particular case was of 12-bottle capacity; it was big and sturdy – and too heavy to be used as a hanging shelf. Since its sides were lovely and it rested with good balance, I decided it would do well as a simple display shelf.
Deciding against table legs (at least for now), I made the table stand vertical to stay tall. It was pretty enough to use as-is: easy to beautify simply by adding décor accents. But I didn’t want a rustic look, I wanted to add some modernity. So I zeroed in on a pastel colour, with a plan to paint on a clean geometric design.
If you’d like to recreate this look, here’s how I went about it: I used acrylic paint. [Kaiser, available at Spotlight is my long-standing favoured brand.] To create clear and straight lines, I applied masking tape at the edges first, and only after did I paint in the triangle. As you can see, I do not trust my hands to keep my paintstrokes in check – all around masking tape for me!
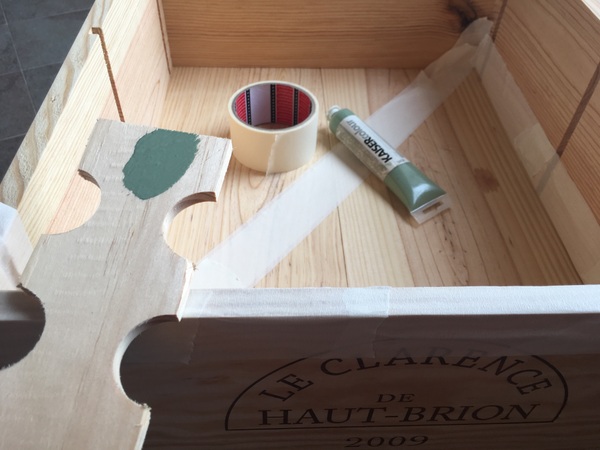
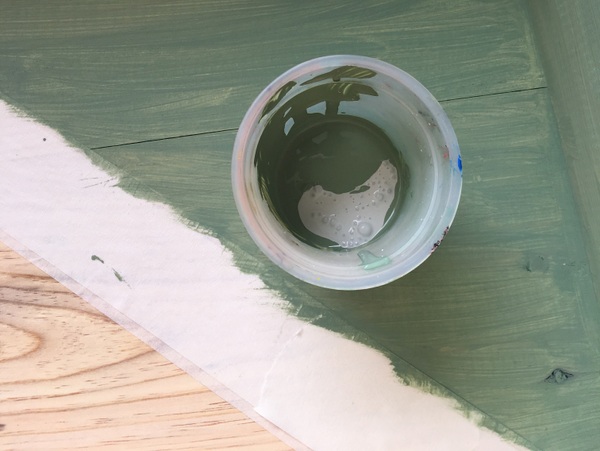
I tested the paint on the separator before applying it on the case itself. Choose a wide shapes brushes, and paint with long, strong strokes that follow the grain. First-timers: When the first coast dries, you may be unhappy with the obviously visible strokes. But no worries, after the second coat the variations will not be visible.
As for me, after the first coat, I realised I had yet made a mistake and chosen too dark a shade. So when adding a second layer, I lightened the color tone by mixing in some white acrylic.
Two coats done, I let the crate dry overnight. The next day, I pealed off the tape to reveal straight, un-smudged lines. Just the way I wanted! 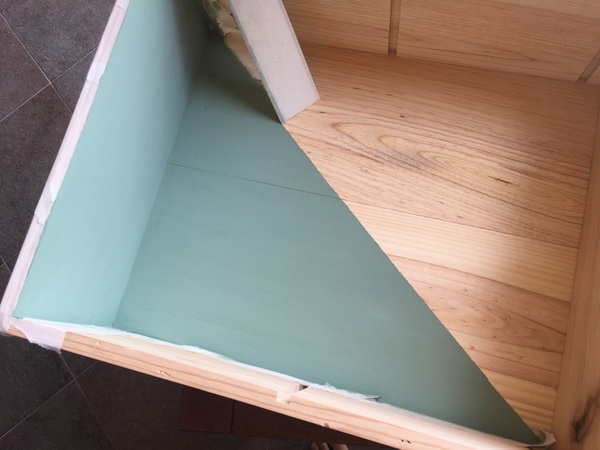
To protect the paint, I applied 2 coats of Watco Gloss Clear Lacquer Spray, leaving a few hours to dry completely between coats. [available at Self Fix ]. If you don’t act a protective layer over the paint in the end, the paint will scratch very easily!
In future, if I find modern table leg designs, I may add them to this piece. Angular, matched-colour legs would definitely add jazz to the piece! I was not in the mood for an industrial look – but if you want to go for it, the easiest way is to add some metal wheels underneath. As for me, I am happy and contented – at least for the time being! 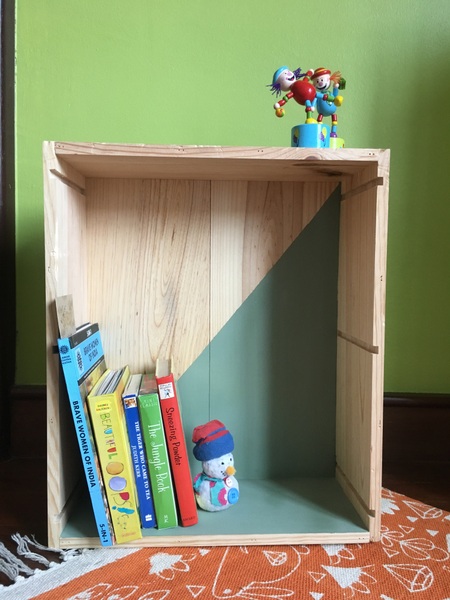
#2 TURNING THE WINE COVER TO WALL ART
As I mentioned earlier, the cover of the wine crate had a couple of residual cracks I couldn’t fix. Since it was already distressed, it seemed easy to go with the flow and create wall art with a vintage poster look. I first scoured Pinterest for options that would be easy to paint and recreate. One hour later, after finding absolutely nothing that my humble skills could confidently handle, I luckily remembered an earlier awesome DIY that Lara had executed for Secondsguru. She had used Mod Podge to transfer an intricate photo on to a cutting tray, and voila! – I realised there was no better way to create a vintage poster with ease!
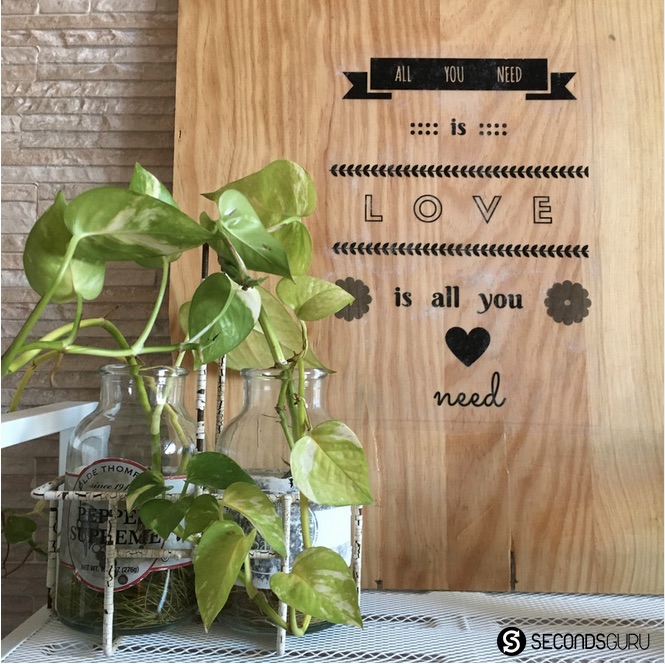
The way ahead became easy. Is there an iconic B&W picture you love – perhaps Audrey Hepburn, her chin resting in her hand as she gazes at you in Breakfast at Tiffany? Or a cheesy quote, say, “It’s Wine o’Clock!”? Or a Bansky print? Now is the time to choose a slogan / design. As you can see, I simply created a poster from one of my favourite song-lines on Canva.
For detailed steps, do read Lara’s article here. But in a nutshell, here’s what I did:
#1. I printed the mirror image of the poster I wanted on a thin, simple sheet of paper – and at the same size as I needed. You can use multiple images and printouts if you need to arrange a large wooden base.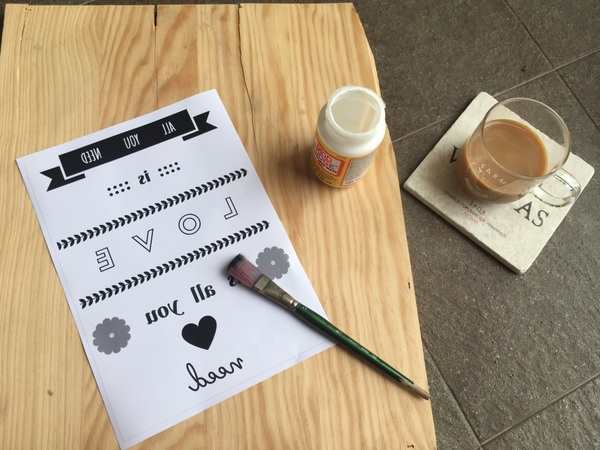
#2. I applied this print out upside-down onto the wood using Mod Podge, the brush strokes were in line with the grain of the wood. I also took care to clear out any air bubbles with a plastic card. 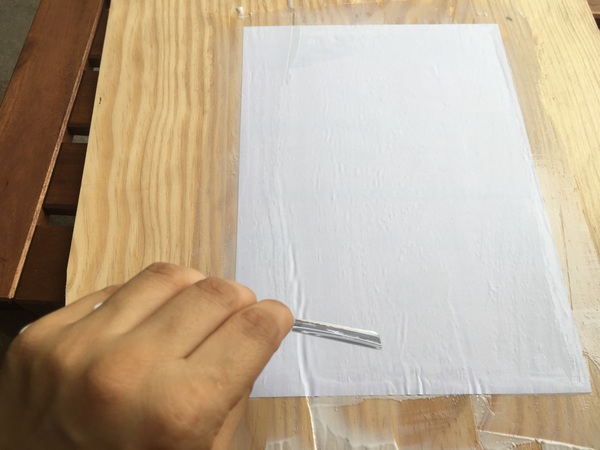
#3. After about 8 hours, when the Mod Podge was completely dry, I used a very wet towel with mild strokes to remove the paper. By this time, the ink had transferred on to the wood, and gradually I was able to ease the paper sheet away. 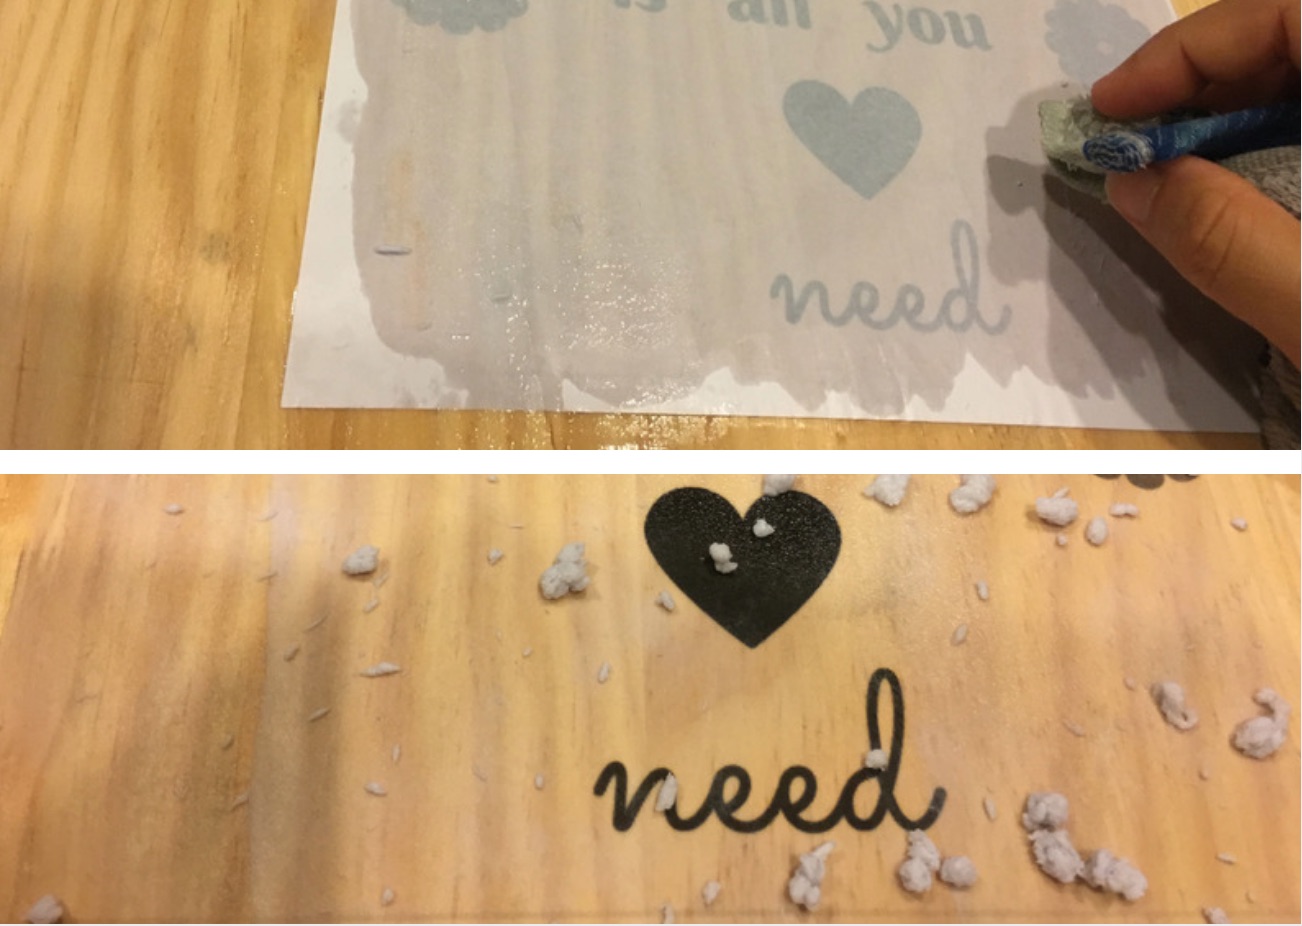
#4. Once the wood was completely dry, a thin layer of white paper remained. I just ignored it and applied another coat of Mod Podge (in the same direction as the grain of the wood). 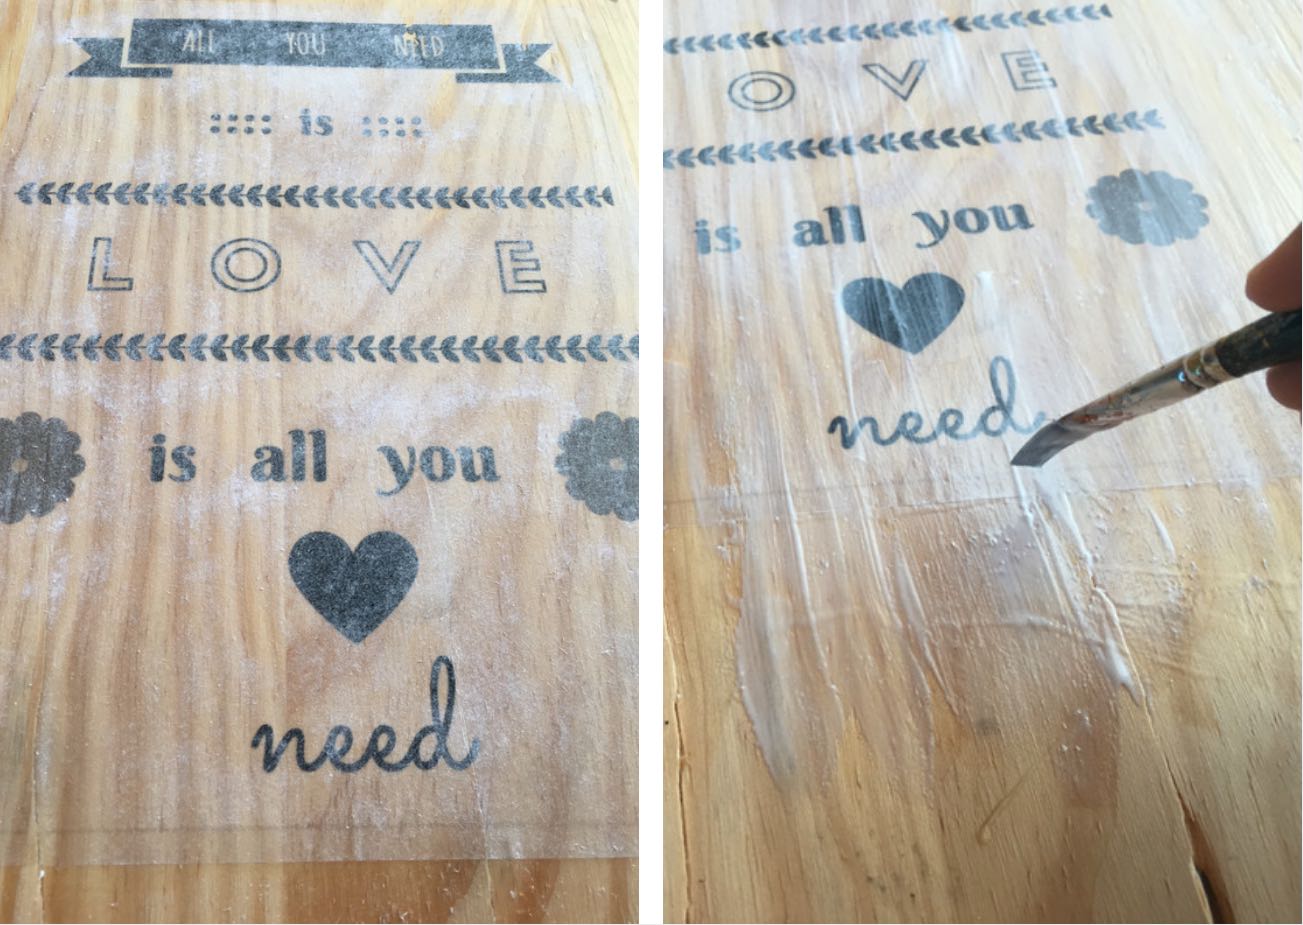
#5. All dried? It’s done!
If you intend to hang the wall art, simply drill two holes on top and use a jute string to secure. But as you can see, I have just let it stand on a shelf leaning against the wall.
So do you have a wine case delivery around the corner? Else keep a lookout for these treasures which (why?!!) people leave behind. It’s certainly not trash – do drop in a comment on how you give them a makeover!
……………………..
Related Posts
DrabToFab | Broken, abandoned tray table becomes a bright addition to the living room


0 Comments