Published 21 March 2016 ● Last Updated on 25 November 2016
The magic of Easter is not something I grew up with. But with my kids growing up in Singapore – having Easter parties and treasure hunts and too much KinderJoy – I have figured the enchantment of it. I’ve also met families who carry Easter traditions across years, even generations, and seen posed (and unposed!) moments filling up their memories, photo albums and of course, their FB newsfeed!
The crux being, Easter is a great family bonding time. It is not just a festival but a tradition that taps on families crafting together, staying together. And so this week, I have a pair of DIYs – not the ubiquitous egg-painting that I, without a lifetime of experience, am awful at! No, these are novel ideas that upcycle egg-shells into quirky curios. You could gift them or have them around the house as a conversation piece. But most importantly, I guarantee you will enjoy the experience of sitting and creating together as a family.
DIY #1: Candles. Perfect for young-at-heart and actually young adults!

– Washed and dried egg shells, broken carefully to get a wide top
– Candle wax (I used beeswax, purchased from Qoo10 Singapore. 100 gms was enough for 4 eggshells)
– Wicks (I used traditional Indian wicks – diyabattis – as they were lying around the house)
– Wickholders (optional) (I strung my diyabattis through used wickholders from burned-out Ikea teacandles)
– An egg-cup holder
– Heat-friendly utensils – 1 large and 1 small – to doublebroil the wax
We are an egg-loving household, so it took us just a few breakfasts to get a good supply of egg-shells. I rinsed these with water and air-dried them completely before storing them in egg-cartons till the d-day.
I didn’t paint the eggshells – I love the natural look – but if you are a pro at dyeing colors, go for it! You could paint the outside – and the inside. Food grade colors would be perfect. But if you are planning to use oil paints or the like – ensure that they are not flammable.
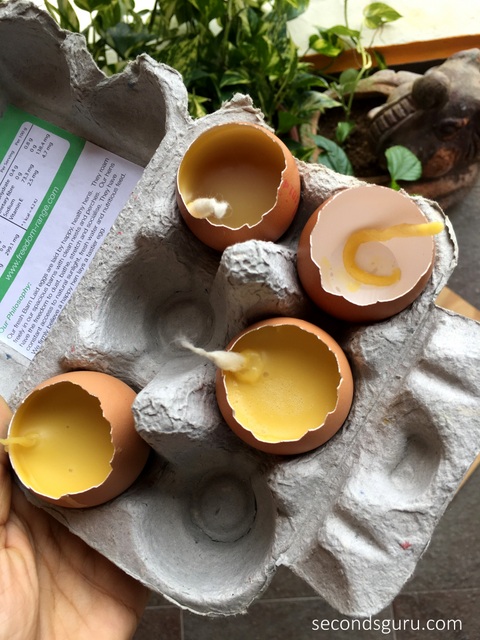
Once you have the eggs ready, you need to add a wick. I honestly didn’t know where to buy these, so ended up using diyabattis that we use in our home temple and hence have a ready supply of! I secured them by stringing through metal wick-holders left in burned-out ikea tea candles. In hindsight, the wickholders were unnecessary. If you are unable to buy wicks, use cotton twine and dip it in hot wax to saturate the threads. Google tells me that should do the trick too 😉
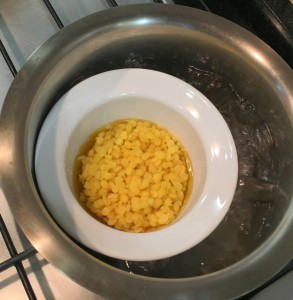
Next, you need to ready the wax. I used wax pellets – available in various qualities, quite easily, on Qoo10 Singapore. I ordered natural beeswax, which seemed reasonable at $9 with free shipping! But you can take your pick of wax (including old candle remnants!). Irrespective of what wax you use – you will need to double broil it. In other words,
– Put your choice of wax in a small vessel and
– Place this utensil within a larger vessel.
– Pour water in the larger vessel and place it on fire to boil the water.


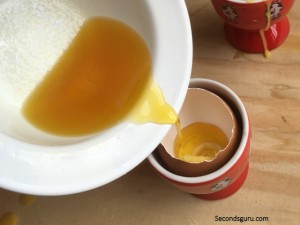
The remaining melted wax can be poured into the eggshells. Be careful with the heat. Use tongs to hold the wax-utensil. And place the egg-shells in an egg-cup holder. The heat of the wax passes through the thin shells very easily, so don’t hold the eggshells in your hand. Use a placemat / newspaper to save your surface from spills. You can use a funnel, but I found it unnecessary – direct pouring felt easier as the wax flow is easy to maneuver.
I made the mistake of having some wicks too close to the eggshell. That lead to egg shell blackening when the candles were lit – so needless to say, avoid this!


DIY #2: Seed planters. Perfect for kids!
Eggs represent rebirth, new life and spring, and what better way to upcycle them than a new lease of life as plants!
I’d originally planned this DIY as a mere distraction for my daughter. I was making candles [the DIY above] for the first time and didn’t want her million inquisitive and distracting questions as I struggled. Besides, I was going to heat wax and didn’t want her making sudden, curious appearances at my elbow in the midst of things!
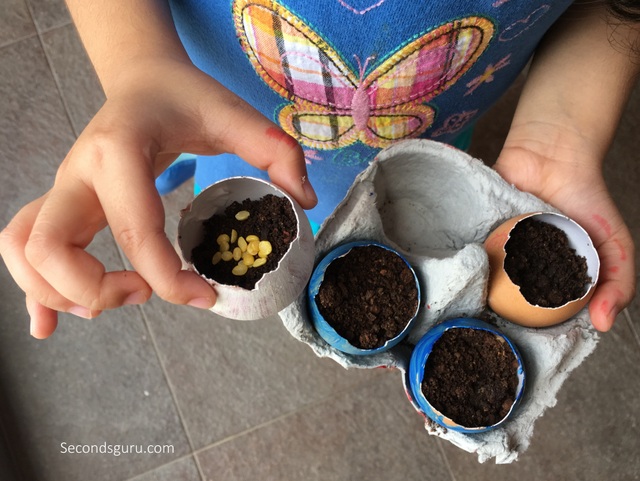
So I just handed her a few eggshells and rough directions – and to my joy, this turned out a perfect activity for a 4-year-old, as easy as 1-2-3! All she needed to do was:
– paint the eggshells, wait for them to dry
– fill eggshells up with soil from our house plants (they won’t miss a few spoonfuls), and
– bury in some lentil seeds we always have in our pantry (green beans / kidney beans work well).
The steps are easy enough for a child to manage without supervision (by this age, they have thankfully outgrown eating mud!). My only contribution was to cut out the egg box to exact 4-squares to set up the eggs securely.

exciting egg-citing!
Happy Easter!
Related Posts
Easter diary | Transforming eggs to memories


0 Comments