Published 12 June 2016 ● Last Updated on 1 October 2020
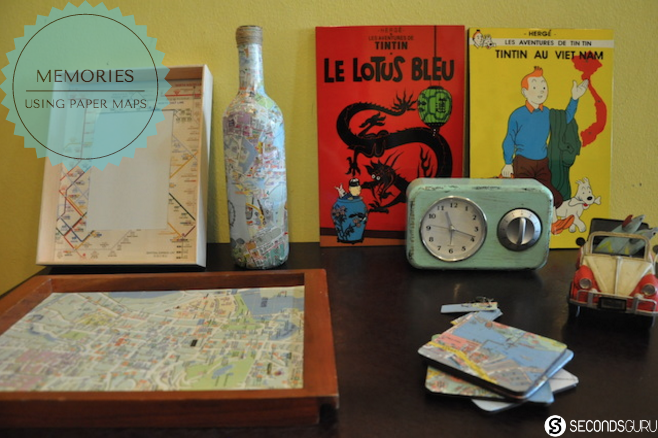
Traveled the world or not, all of us have glossy paper city maps/guide maps collected over the years- picked up each time you arrive at the airport of a new city – after all you do need directions to get you around! The only problem is that usually each member of any traveling party picks up several maps at a time- one for the sites, one for the roads, one for the best discount coupons- while -most of the time – what is eventually used, is 1 to 2 of these. As a result, what inevitably stays on with us after the travels – besides beautiful memories, lots of pictures, some shopping- are lots and lots of maps!
It so happens that in my case, while I have traveled a fair bit, I usually do not pick up paper maps. Yes you guessed it, I try to avoid increasing my carbon footprint with unnecessary paper trails. Despite this I was recently faced with two situations:
Dilemma #1 and primary inspiration for this article :My personal discipline aside, I am unable to control are maps that house guests visiting us in Singapore leave behind when they are done using them. I can send them in for recycling, yes I can, but I am still creating waste. So I have a huge pile of these Singapore maps.
Dilemma #2 and secondary inspiration for this article: What this time of the year- school ending and long holidays- has inflicted upon many of us in Singapore is, friends, teachers and co-workers leaving the country for better prospects or just traveling back to home base. We are all losing good people we knew in Singapore. This inspiration was kindled by an unprecedented surge in people seeking ideas for ‘going away presents’ on online help forums.
There you go, two dilemmas, two inspiring reasons and I was ready to put my ever growing collection of gorgeous maps of Singapore to create memories in the form of souvenirs. I had so much fun doing this, that beyond a point, I had to stop myself from converting everything I lay my hands on to a souvenir!
What you need?
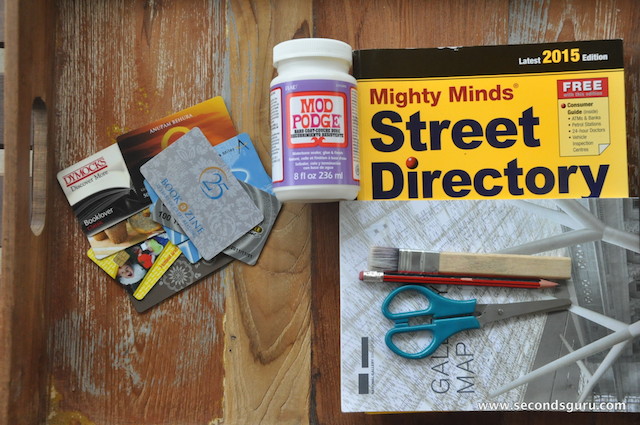
1. Mod Podge [You can find this at Art friend ] and a brush to apply it
2. Pencil, ruler, a pair of scissors, Ikea cork coasters
3. Lots of glossy paper maps[ the non glossy ones did not yield great results]
4. As always, the most important of all, lots of enthusiasm and creativity! Throw the ‘I can’t ever do it’ attitude out of the window, because if I can, anyone can!
Wine Bottle to Wine Decor; Estimated time: 30 mins plus 30 to dry[minus the wine drinking time]
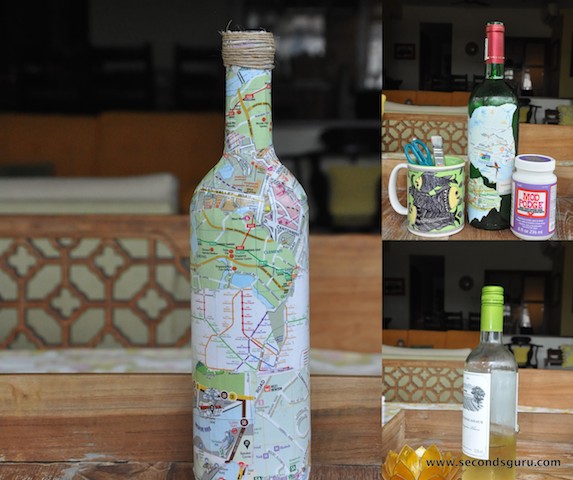
I needed two empty wine bottles -one was needed for the half done demo picture below, the other for the fully done one- for this activity. As I had only one at that time, I had to finish the last dregs of vino in the bottle you see in the picture. I must say, making the souvenir was even more fun after! A small bit of planning on the layout and I was ready to get started. I tore out(I did not use scissors, the rough edges look much better) small pieces of the map, applied mod podge on the bottle using a brush and started sticking as per the plan. Where there were unexpected gaps, I just tore out small pieces which blended in with the general theme and filled in the blanks. Once the pieces were well stuck and dry, I applied a generous coat of Mod Podge on top of fully covered with maps bottle and set aside under direct fan for thirty mins. To give it that final finishing touch, I glammed the top of the bottle with some rope which I had salvaged from a gift packing. I loved the finished product one so much that it is currently adorning my living room (:-0)!
Transform a boring photo frame to a funky conversation piece; Estimated time: 10 mins
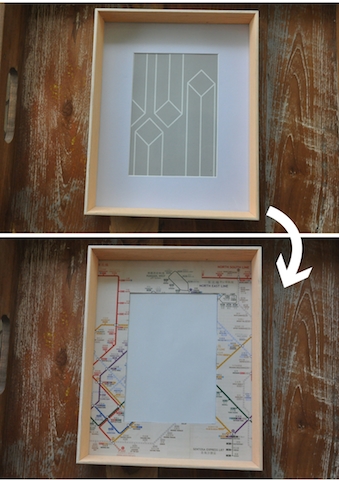
This was as easy as it looks, I selected the map I wanted to highlight on the frame, traced the white border on right parts, cut it and stuck it on! Easy peasy! I chose the Singapore MRT map for this activity.
Give a new lease of life to coasters and expired credit cards; Estimated time: 10 mins plus 10 to dry
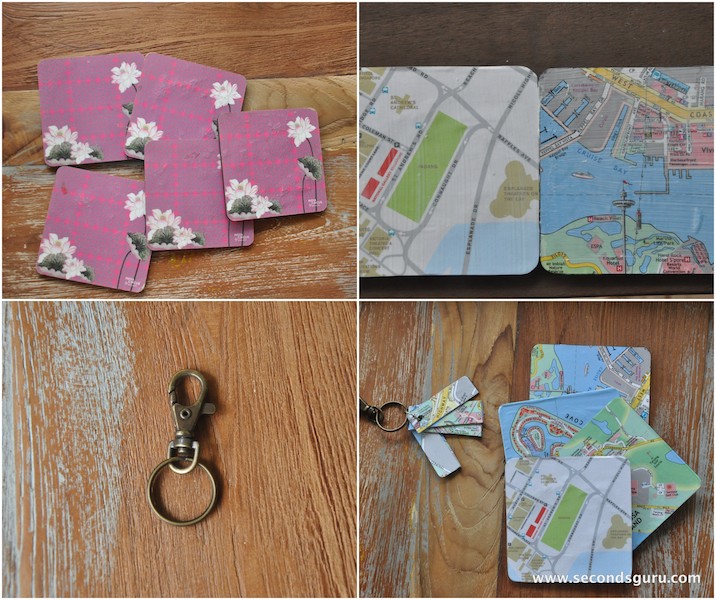
I will caveat both the creations by saying that it involves repurposing old coasters and credit cards, but once done, these get a new life entirely and I would not hesitate giving them as a gift to a globetrotting friend. This DIY was again very simple- I traced out the outline of the coaster and the credit card on the map I wanted to use, cut it out neatly and then stuck it on the base of the coaster and card respectively.
-For the card I stuck the map cut out on both sides. Next I used a ruler sideways to brush clear the air bubbles caught in between. A couple of mins later, once it was dry enough, I applied two coats of Mod Podge let dry for 10 minutes. Next, I cut the card into three equal rectangles, punched holes in them all, and looped them on the remnants of a key chain I had.
– As for the coaster, here too I used a ruler sideways to brush clear the air bubbles caught in between. 10 minutes later, I applied two coats of Mod Podge and set them aside. After trimming to shape, I stuck Ikea cork coasters to the bottom of these map coasters as that bit of the old coaster was quite jaded due to wear and tear. Very pleased with the outcome!
Damaged tray to stylish serving tray; Estimated time: 15 mins plus 20 mins to dry
We all have a pre-loved trays in the kitchen waiting to be replaced – well because they have “served ” us so much! I have a few of them too. Unable to part with one in particular, I was thrilled when I started doing this souvenir project and decided to try the ‘decoupage magic’ on this one! The best news is, it worked. After aligning and tracing the map on the tray, I stuck the map on and removed air bubbles with the flat side of a ruler. 15 mins later, I added 3 coats of Mod Podge and let it dry. That was it! (Psst: A secret. I was so thrilled that I used it that very evening, and placed a bottle of cold water on it while typing away this article. Basic Physics worked to my disadvantage and the entire tray with the new coating of map got wet due to condensation. Thinking on my feet, I quickly patted it dry and placed it directly under the fan. 30 mins later, it looked as good as new. There you go, I tested it too!)
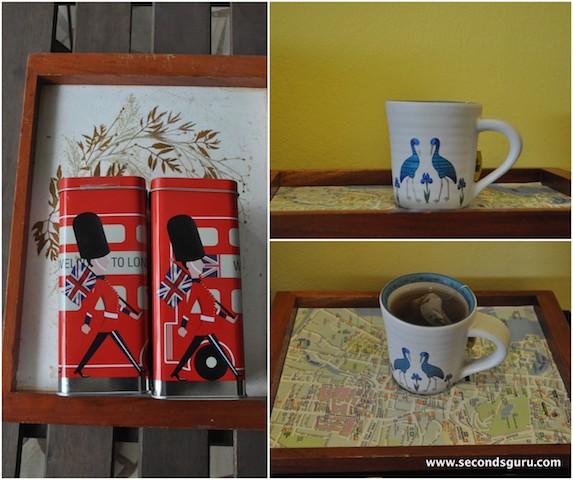
In case you have diligently read this article, seen all pictures , and are wondering what happened to the red tin cans in the last shot-well that’s where I stopped making map souvenirs. For the moment at least! I will turn these beauties into something interesting soon though, that’s a promise! Just watch this space.
Related Artcile- Smarten up your Stepstool using maps


0 Comments