Published 2 December 2018 ● Last Updated on 29 July 2020
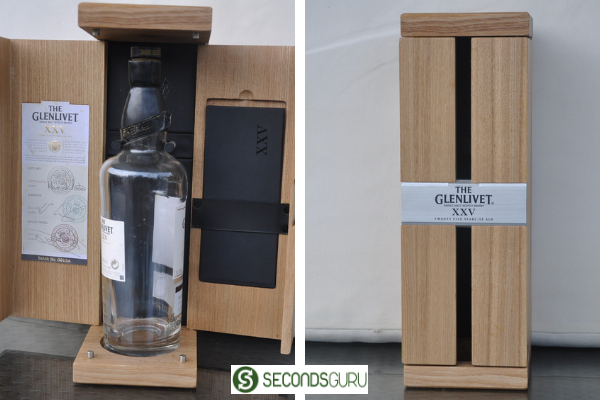
It was time I got my act together. About time I worked on the ever-increasing list of wood items around my home that needed to be given a new lease of life, else they would have to head over to the incinerator and then to the Semakau Landfill. There were quite a few of them- that 12-years-old floor mirror acquired in Hong Kong, the 5-years-old step stool from IKEA, Singapore, the old planks of wood purchased from a garage sale at Camp Kilo Charcoal Club, Singapore and hold your breath, the wooden case that homed the precious 25-years-old whisky case- handed over to me by a true friend, one of the many who always save such cases for me, never the contents somehow! If you are a planner, but not quite the executor, and to make matters worse are creatively challenged – join my exclusive club.
Now that you are in the exclusive club, allow me to share a secret with you – I recently upcycled all these wooden goodies in a matter of 4 weeks. Ok, ok, you got me- creativity is an effort, not a natural part of my being! I was in luck – I tapped on my daughter for help, and she was marvelous- that’s how these projects saw the light of the day.
#1 Wooden Whisky Case to a storage box
What it takes:
Sanding paper, acrylic paints, pencil, eraser, fine paintbrush, masking tape, washi tape, decoupage medium*
How it goes:
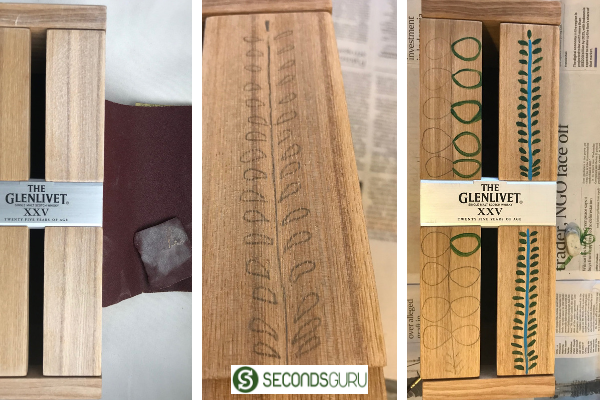
Lightly sand the surface of the case. Wipe the area with a wet piece of cloth and let it dry overnight. Identify the design and colors you will be working with. Next day, draw rough outlines of the pattern – you can use an eraser on wood, so do not hesitate. Once lines are drawn, you are set to start coloring. Color carefully, letting each sub-part dry before starting on a new section.
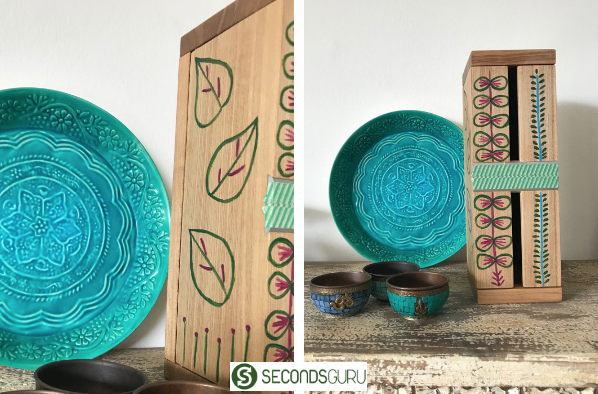
Acrylic paint dries very fast so an hour between each section is good enough. Once all the colors dry up, cover with a few coats of decoupage to seal the colors in! I use this to store my paint brushes in at the moment. Where is it kept? In the living room!
Struggles:
The metal section with ‘Glenlivet’ written on it was my biggest challenge – Acrylic paint doesn’t work on that surface and I would never buy paints for single use, so I just covered it with washi tape.
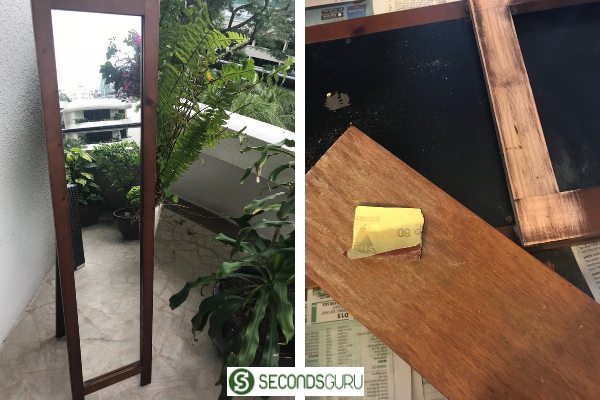
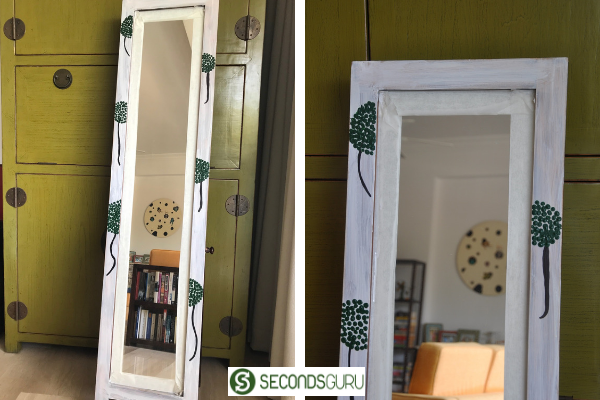
#2 Floor mirror classic brown to hand-painted funk
What it takes:
Sanding paper, acrylic paints, medium sized brush, paint brush, black sharpie, decoupage medium*
How it goes:
Lightly sand the surface of the wooded area of the mirror. Wipe the area with a wet piece of cloth and let it dry overnight. Cover the edge of the glass mirror bordering the wood part with masking tape. Paint the base coat a few times on the wood all over, letting it dry evenly each time until you have the desired base color.
Once the base color is fully dry, use a black sharpie to draw the stems – keep the thickness to your taste. Now is the fun part, take a gentle dollop of the acrylic paint of your choice on a medium-sized paintbrush for the dandelion florets. Dab on gently in the shape the dandelion flower – around the stem. After the colors are dry, check and add on a coat of decoupage. And done!
Struggles:
Not really a struggle but be careful not to dab on too much acrylic paint, else you will end up with wet and bumpy florets.
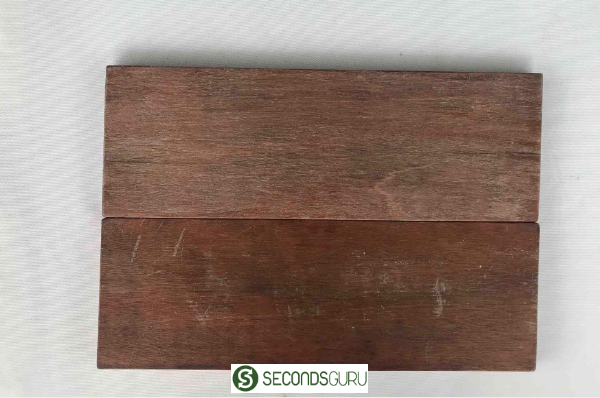
#3 Wooden planks to wall decor pieces
What it takes:
Sanding paper, acrylic paints, thick paintbrush, masking tape of varying widths, decoupage medium*
How it goes:
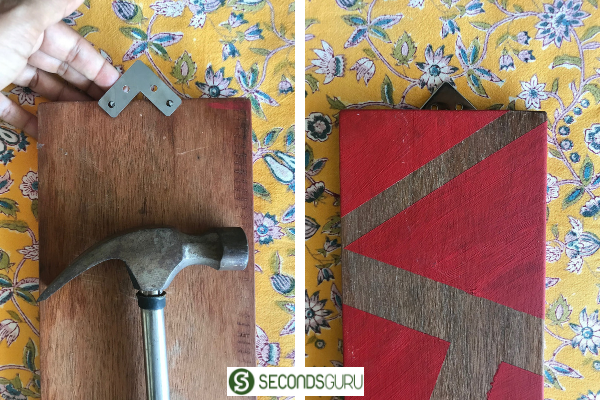
Lightly sand the surface of the wood planks. Wipe the area with a wet piece of cloth and let it dry overnight. Gather the masking tapes and start sticking them on the plank in the pattern of your choice.
Once done, dab generous coats of acrylic paint on the uncovered areas of the wood face. Let it dry and repeat a few times over to get a rich color. Alternatively, you can stop when you reach the color of your preference. Let this dry for at least 48 hours.
Now comes the fun part: start carefully peeling off the masking tape. Enjoy the fruits of your creativity.
Finally, add a few coats of decoupage medium to seal the colors. I have these plans hung in my living room wall, so I added nail holders at the back.
Struggles:
I had a few challenges when I was peeling the masking tape off – color peeling off being the hardest, but I was not too fussed about this. Another one was the masking tape not coming off very neatly – this can be managed if you peel off carefully section by section, rather than going for it all at once.

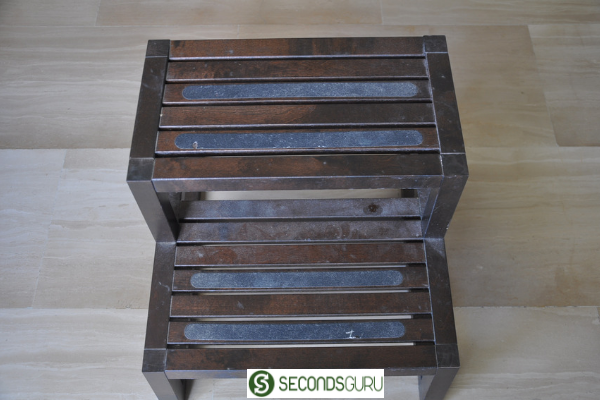
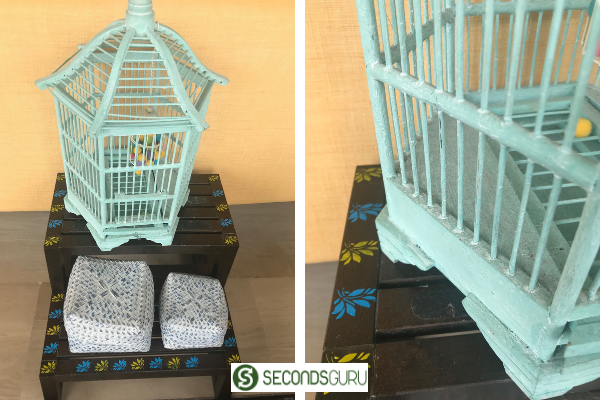
#4 Step stool to home accent
What it takes:
Sanding paper, acrylic paints, fine paintbrush, stick on stencil design, decoupage medium*
How it goes:
Lightly sand the surface of the step stool that you plan to stencil on. Wipe the area with a wet piece of cloth and let it dry overnight. Pick the stencil pattern of your choice, decide the color/s you want to work with and then prepare the paint – take the color on an old sponge, even old the paint using an old credit card and dab the brush on to pick the paint. Start filling in the pattern in the stencil.
A tip here: I have suggested stick on stencils, however, if you have regular ones, make sure you stick them on the surface using tape – this keeps the frame in place and prevents smudging. Let each pattern dry before working on an adjoining one – if your design has close-by patterns – as this can lead to smudging too. Once all the patterns are done, let the colors dry. Finally, add a few coats of decoupage medium to seal the colors.
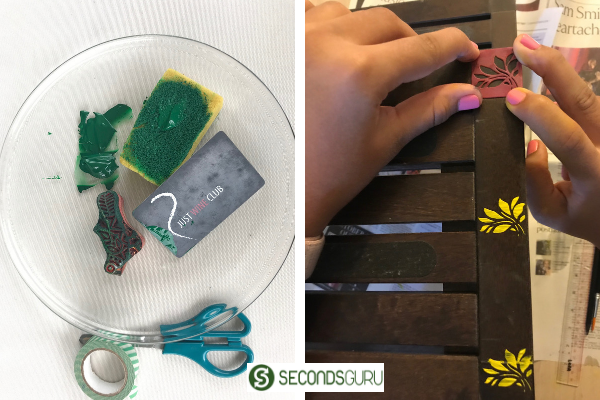
Struggles:
Keeping the stencil in place was a big challenge. Wet acrylic paint is easy to clean up using a wet cloth. So we did have to clean a few up. Eventually, the hard work and focus paid off.
Finally
At the end of the day, I must mention that 65 % of the credit goes to my daughter Aadya Behura and about 35% to me. She did most of the work, I did the photos and this write up :-)! If you have any similar interesting tips to give a new lease of life to wood items in your home, do share with us on admin@secondsguru.com or in the comments below.
* The decoupage medium we use is ‘Modge Podge‘. It is easily available at craft stores like Art Friend and Spotlight. You can even order from Amazon.
-Lara


0 Comments