Published 20 November 2016 ● Last Updated on 19 November 2022
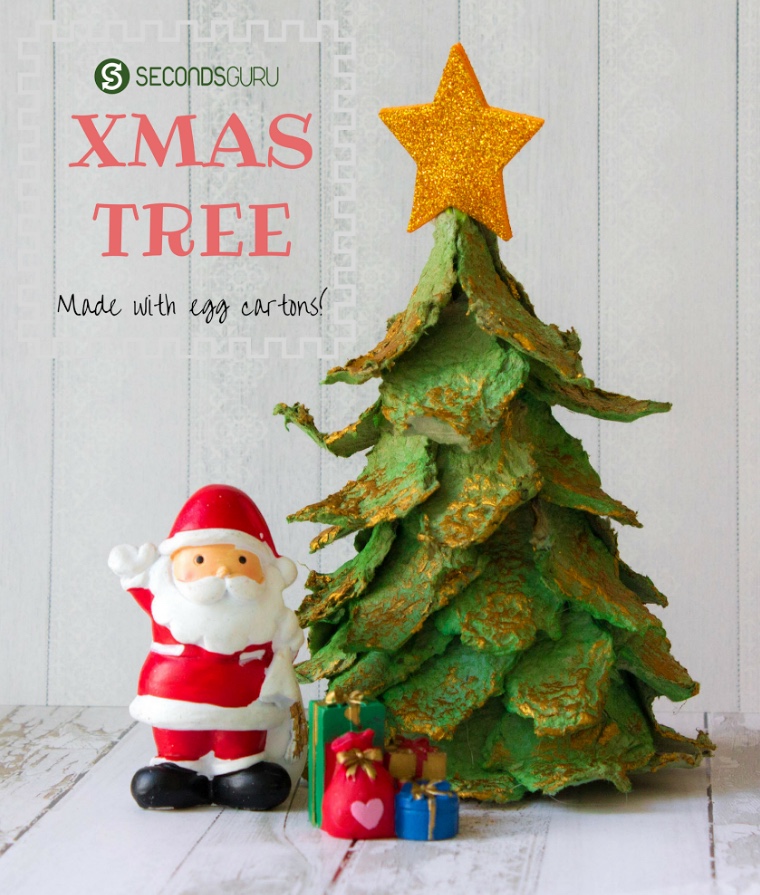
The DIY idea comes from our guest blogger this week – Juhi Khanna, a card designer whose creations add a sunshine cheer to all seasons and occasions.
While I am not much into upcycled crafts, my almost-5-year-old daughter is full of ideas about how to recycle. She keeps going on and on about her often far-fetched recycling brainwaves and most of the time I simply nod in agreement with no intention of taking them up ever! But every once in a while she comes up with a gem that I find hard to ignore! The egg carton Christmas tree idea is one of them. Well, the basic idea is hers and I simply improvised.
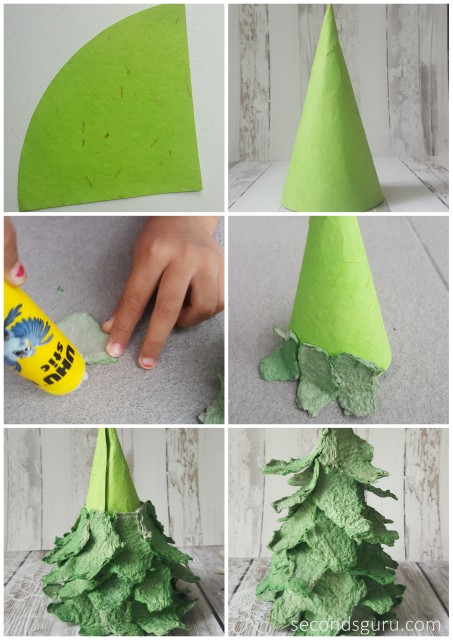
So let’s see how we made our table top Christmas tree. We began by tearing off rows from an empty 30-egg carton. The tearing needs to be a little precise so parents might want to do this bit. Now tear off individual egg cartons and flatten them by tearing off the 4 sides almost till the middle to make it look like a flower. We will be using the wrong side of the egg cartons as the texture at the back is more interesting.
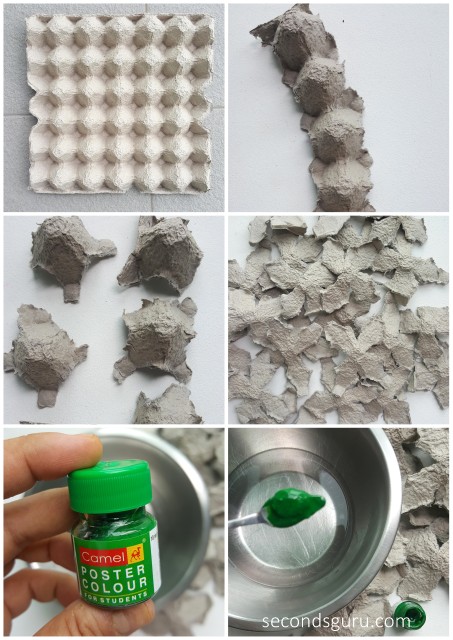
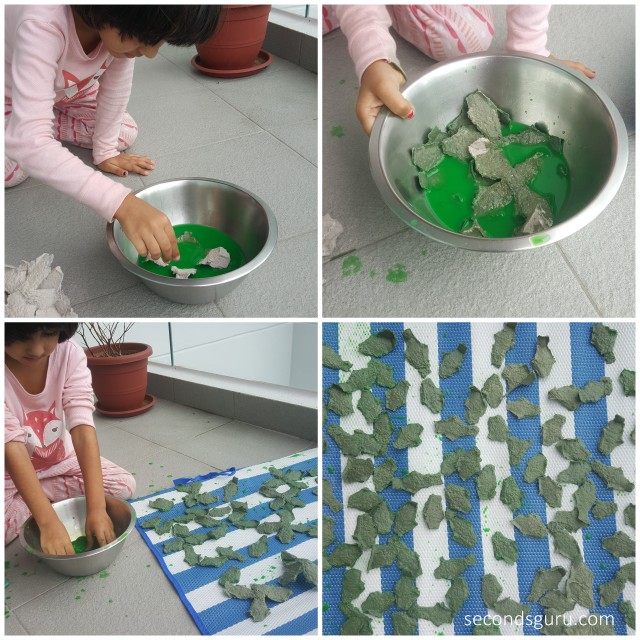
Now’s the fun part, ask your child to soak each egg carton flower in the green paint. Make sure that each piece has completely soaked in the colors before you set it out to dry. This was Miss K’s favorite part, she was soaked in green paint by the end of it, but that was nothing to worry about as the paints we used were completely safe and washable.
Now begin pasting the petals on the cone starting from the bottom. Keep adding layers till you reach the top.

– Juhi Khanna
Juhi is a semiconductor engineer turned entrepreneur. Apart from running her paper crafts business, she designs cards for a few stamp companies, does freelance craft blogging and is an aspiring graphic designer. She has a 4-years-old daughter who loves paper crafts as much as her; needless to say they have a lot of fun crafting together. Follow her on Instagram for inspiration!


Sudha
30 November 2016Wow..Wow..Wow..very smart n clever idea. I just love this.
Sudha
sudha-kalra.blogspot.in
crazycrafter-craftsuppliesshop.blogspot.in
Mamta Chhabra
26 November 2016How inventive, resourceful and, to round it all off, a lot of fun. Kudos