Published 15 May 2016 ● Last Updated on 8 October 2020

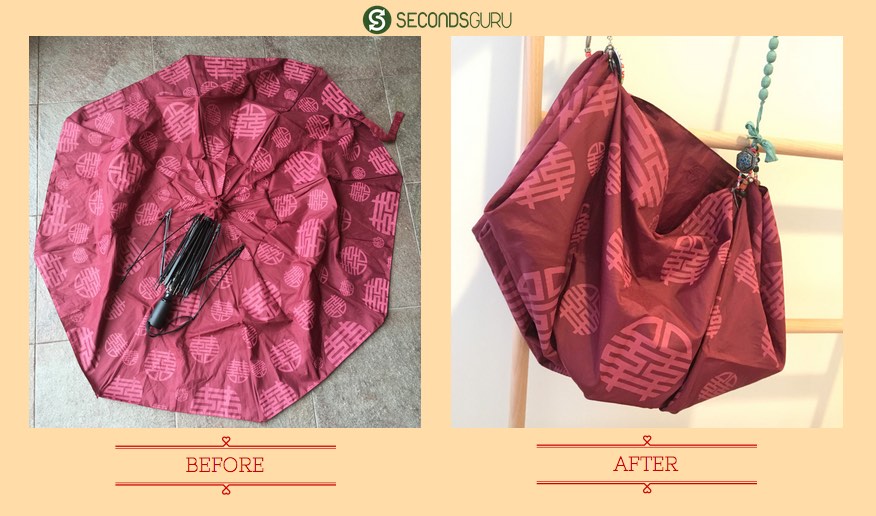
The umbrella-to-tote is one such project. As long as you have an old umbrella that refuses to function well – you know, the sort that will turn inside out in storms, or where the spikes just don’t connect to the fabric anymore – you have what it takes to create this bag! I used one of my favourite buys from G.O.D. in this experiment. It had ended its useful life and I love the print 🙂
Umbrella fabric is perfect for re-purposing into bags. It often has cool designs and patterns; the material is durable and waterproof; and it cannot be recycled – thus perfect for upcycling. When you turn a ruined umbrella into a stylish bag, you are keeping it away from a landfill, and reducing your need to buy a factory-made bag.
A regular umbrella can make a spacious tote with very little time and effort. There are many sewing tutorials you can find online (I love what Cucicucicoo created!), but what I have in this post is a completely No-Sew alternative. Here’s how:
Step 1: Strip the umbrella with care
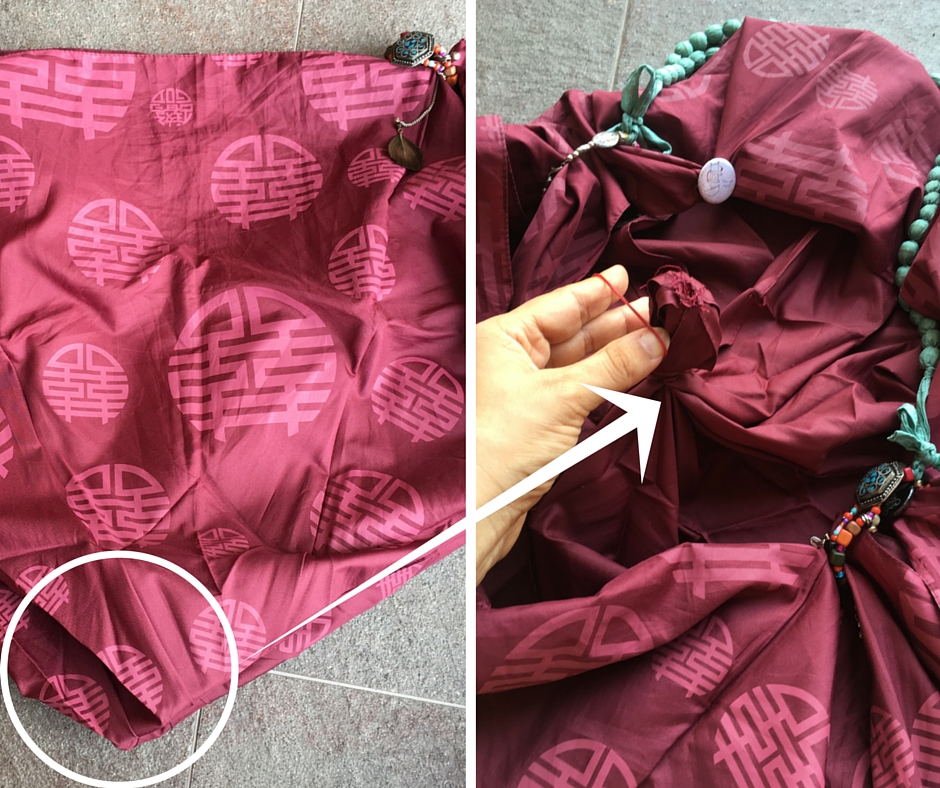
Use a penknife or sharp scissors to remove the umbrella fabric from the frame. We will be using the entire material to create a bag, so do not damage any part of the cloth. The umbrella I used was very easy to disassemble, as you can see from the pictures. I had expected the apex to be tricky but it turned out to be a screw top.

In case the cloth is dirty, wash it with mild soap and warm water, and hang to try. Do not iron the cloth under direct heat! I do not know what the material is made of, but I am willing to bet that the patterns will melt easily.
Step 2: Tie up the corners
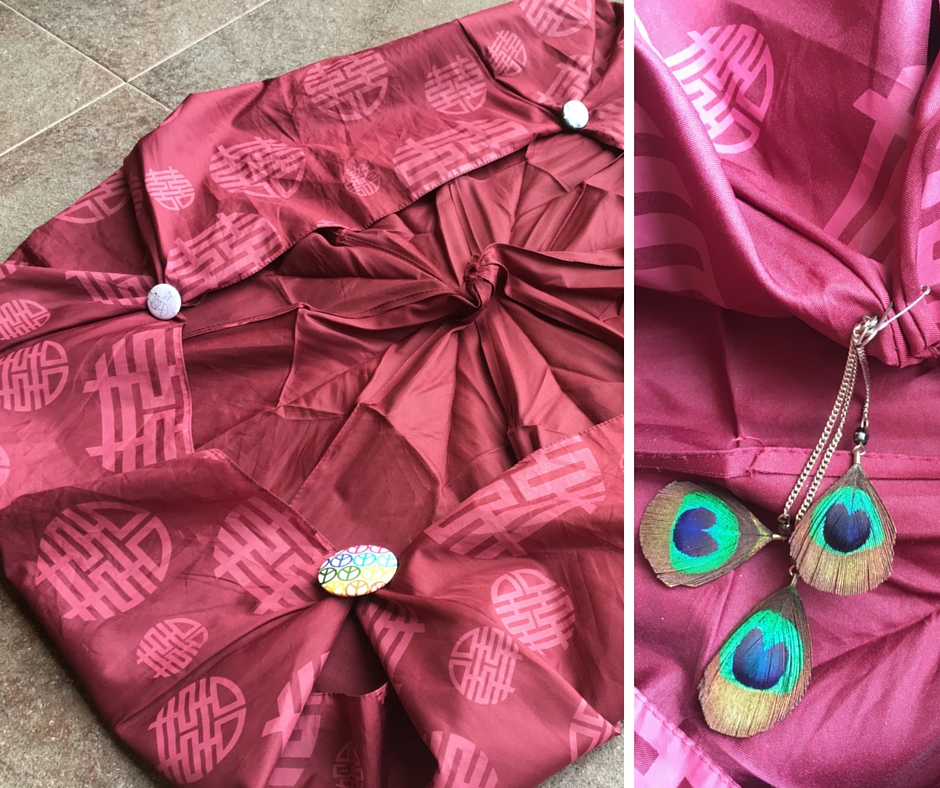
There are typically eight ends to the umbrella. Pair up the ends to get four corners. Secure these corners neatly with safety pins.

Step 3: Loop the corners
This step is a great chance to creatively use all the old bracelets, friendship bands, etc you have hoarded through the years! Declutter your cupboard and choose two hardy bracelets that have clasps (not the elastic variety). Anklets that you may have purchased from night markets at Thailand and never used again (yep, I am guilty of that too) are perfect for this purpose.
The corners I secured in the previous step have a gaping hole under them. Loop each bracelet/anklet through adjacent holes, and you will now have something looking like the picture below.


Step 4. Strap it up
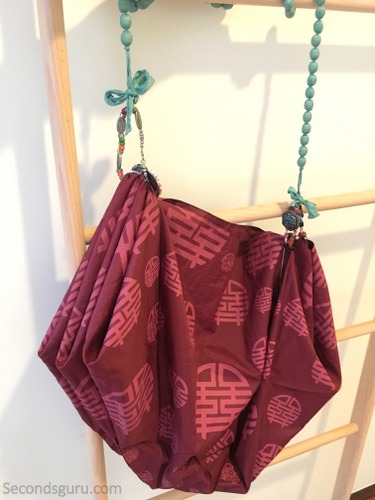
Long necklaces are perfect to strap up this rather kitsch tote bag! I used a Cambodian bead necklace because it tied up easily with the loops of the bracelets. If you don’t have something similar, just open your closet and raid whatever works! You may need a pair of pliers if your strap/necklace has metal chainlinks, but it shouldn’t be hard work. (If you expect to DIY more in the future, invest in a pair of jewellery pliers, available at most craft stores including Art Friend and Spotlight)
I loved my handiwork and am sure you will love yours too! So go ahead, take that selfie, and do not forget to tag Secondsguru when you post it on Facebook or Instagram!
Update: One of our readers – Stuti Gupta of Singapore – wrote in to us saying that the safety pin wasn’t strong enough for her bag. So she modified our design by handsewing bright buttons instead. Do try this if you think your button buddies / pins aren’t pulling their weight. It’s a little bit of sewing, but the easiest sort!


Agatha
16 May 2016Anuja, you should try making the school bag cover for rainy days!
Anuja Byotra
17 May 2016Thx Agy – will look it up!
Cucicucicoo: Eco sewing and crafting
16 May 2016That’s a great way to make a no-sew bag! It’s very funky with all the different jewelry accents! Great job and thanks for the shout out! 🙂 Lisa
Anuja Byotra
16 May 2016Thx for the encouragement – I am a fan of your crafts!
Varun lohia
16 May 2016Very nice.
Anuja Byotra
16 May 2016Thanks for the encouragement 🙂